ECSI Loan Table Updating - Information for Running the ECSI Loan Table Build in PeopleSoft. Do this process on the first workday of each month.
The Loan file
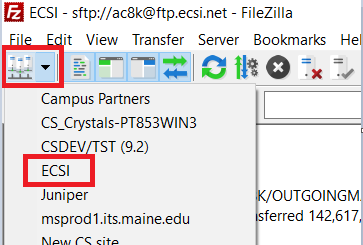
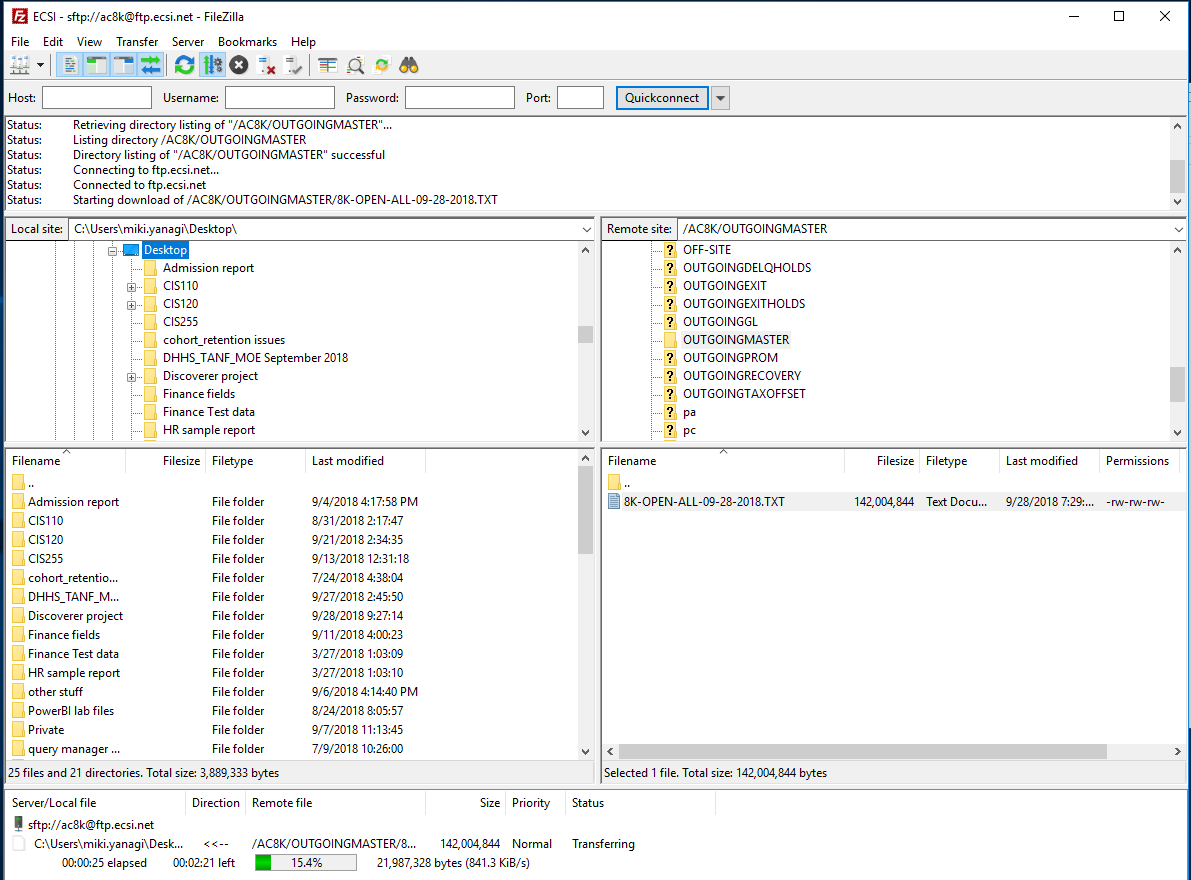
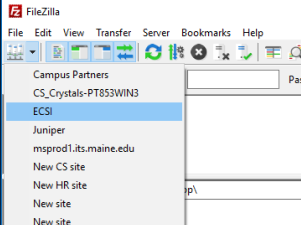
- The loan file is obtained via SFTP from ECSI . Open FileZilla and click the icon below the "File" menu and select ECSI.
The setting for the folder is as follows, but you should be set up already in FileZilla.
Their FTP host is ftp.ecsi.net and you need to connect as user ac8k and get password from supervisor. Go to File > Site Manager to set up a new site. Here is an example using FileZilla:

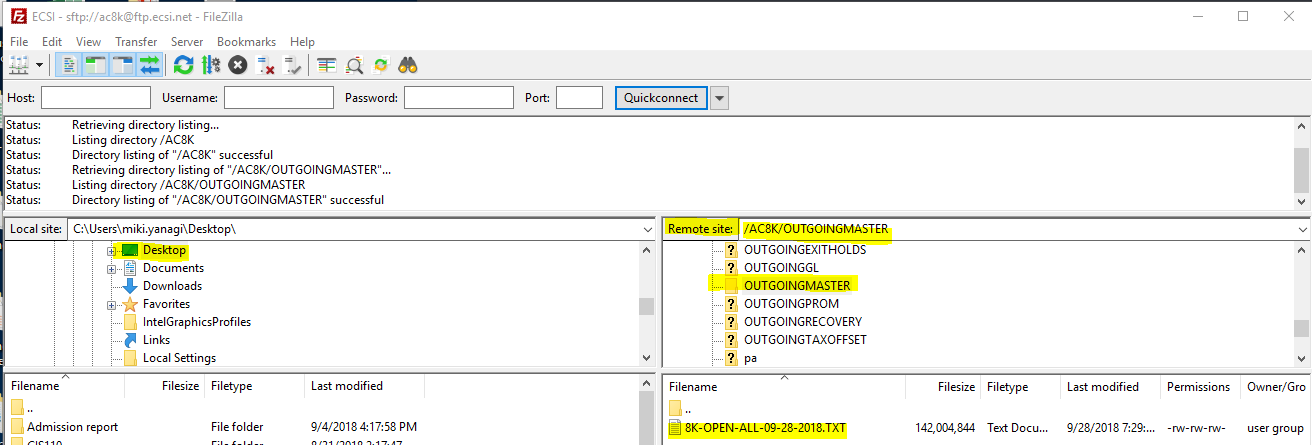
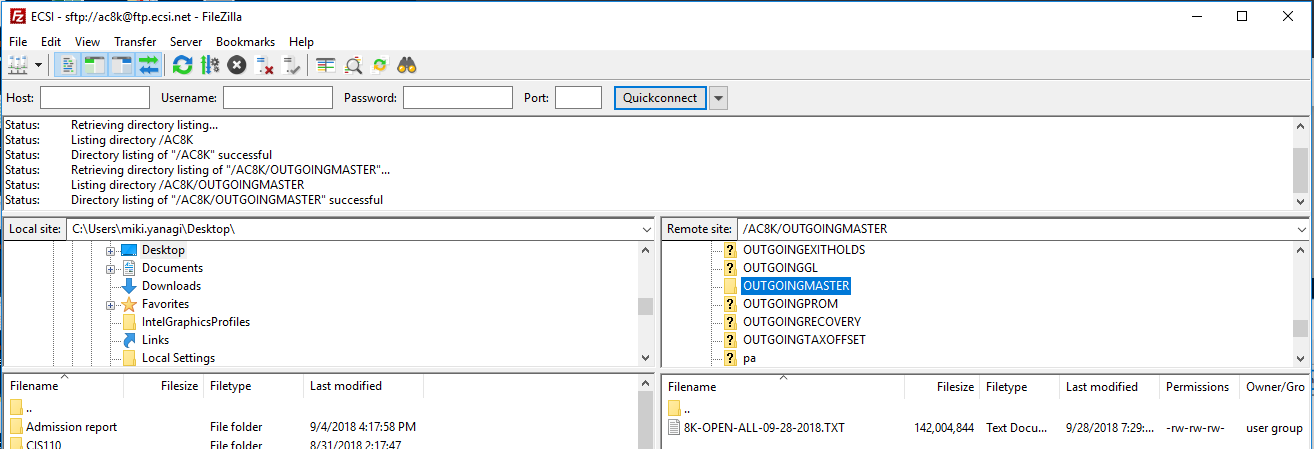
2. The file will be found in the directory /AC8K/OUTGOINGMASTER. Expand the "+" for AC8K folder under "Remote site" and find the file. The most recent file is named with the last working day of the prior month. Double click the file and download this file to your local drive (Desktop).
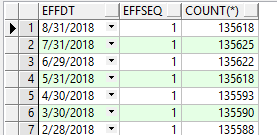
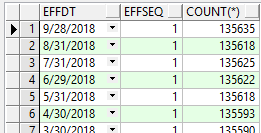
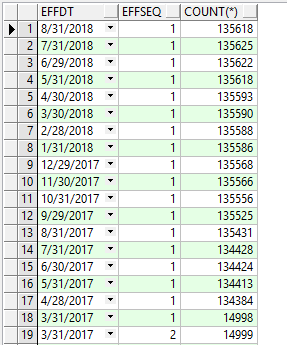
3. In CSRPT, check the current table with SQL similar to this:
SELECT EFFDT, EFFSEQ, COUNT(*) FROM SYSADM.PS_UM_ECSI_LOAN GROUP BY EFFDT, EFFSEQ ORDER BY EFFDT DESC, EFFSEQ
Note the counts and the dates (we'll check the numbers later.) The latest day should be the day that the file is last updated.
The Table Build
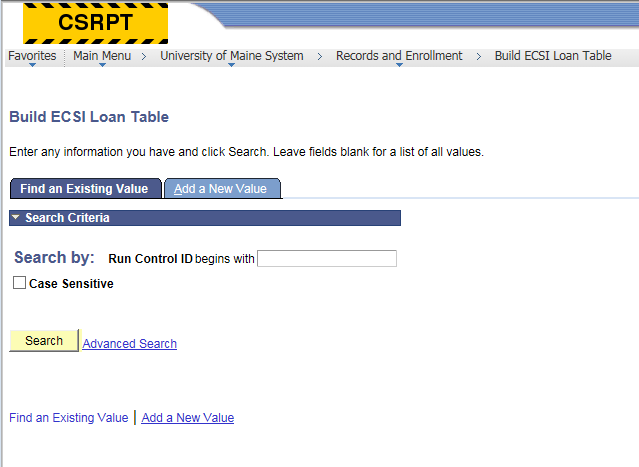
- This process can be run using the following path in the Campus Solutions Reporting Database (CSRPT):
University of Maine System > Records and Enrollment > Stdnt Rpt File Creation Page > Build ECSI Loan Table
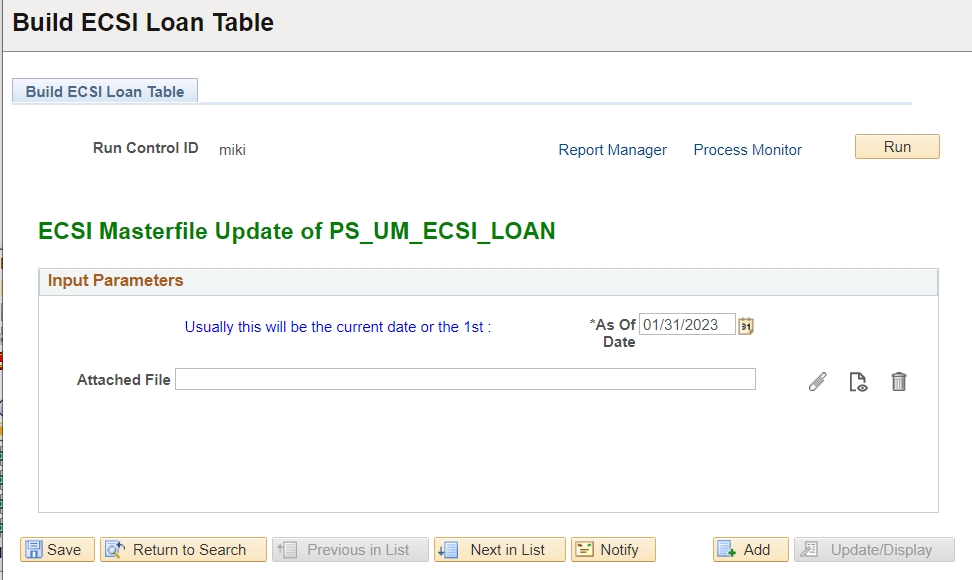
By clicking on Build ECSI Loan Table you will see the following:
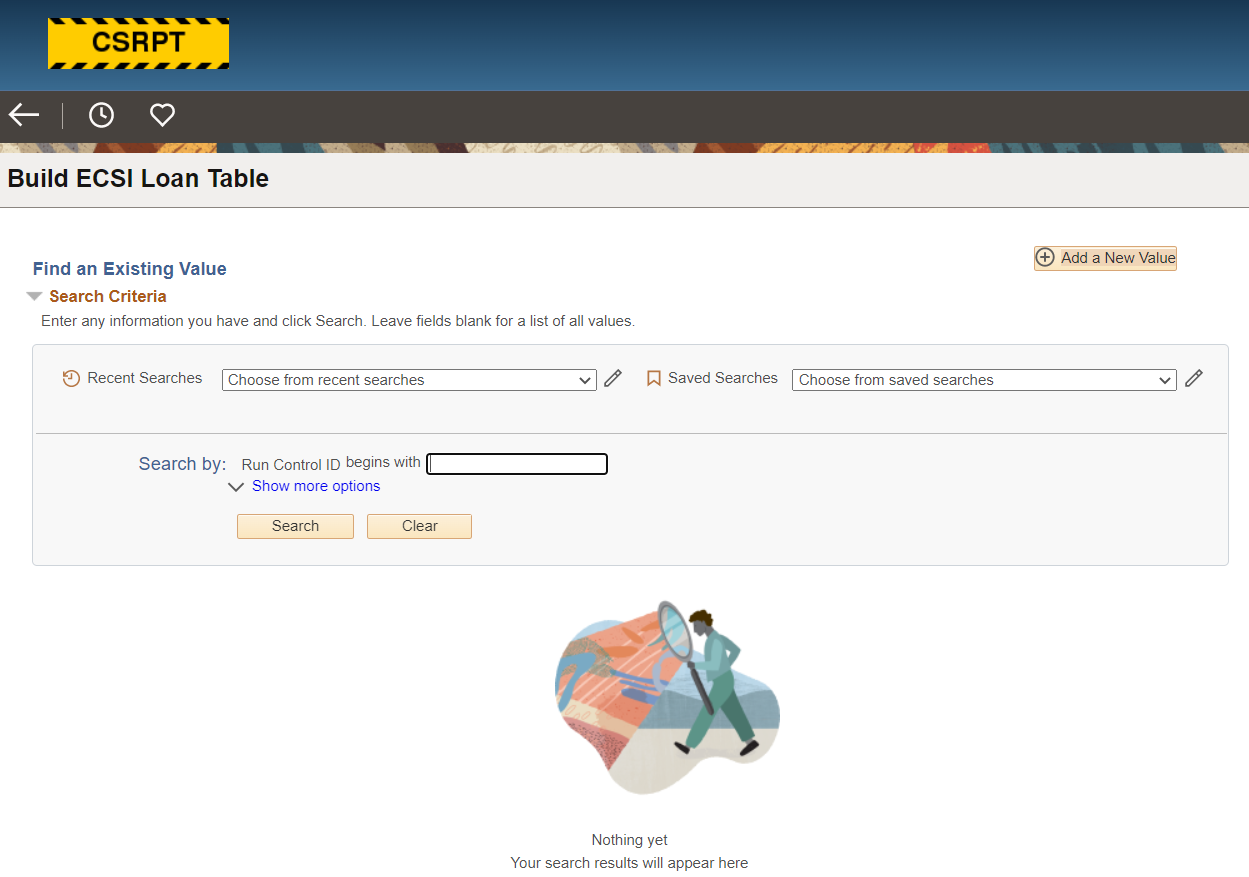
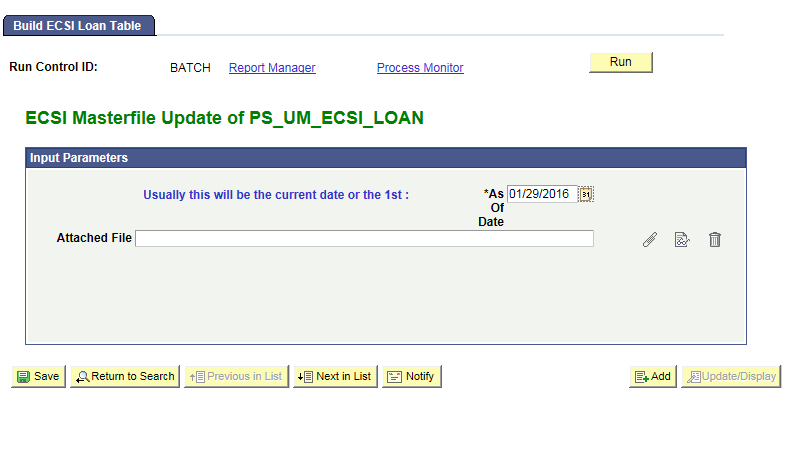
2. The Add a New Value Tab will allow you to enter a short descriptive text value of your choosing. Enter your run control ID and hit the Add button or use the Search button to retrieve a previously entered run control id. This is your Run Control for loading the PS_UM_ECSI_LOAN table:
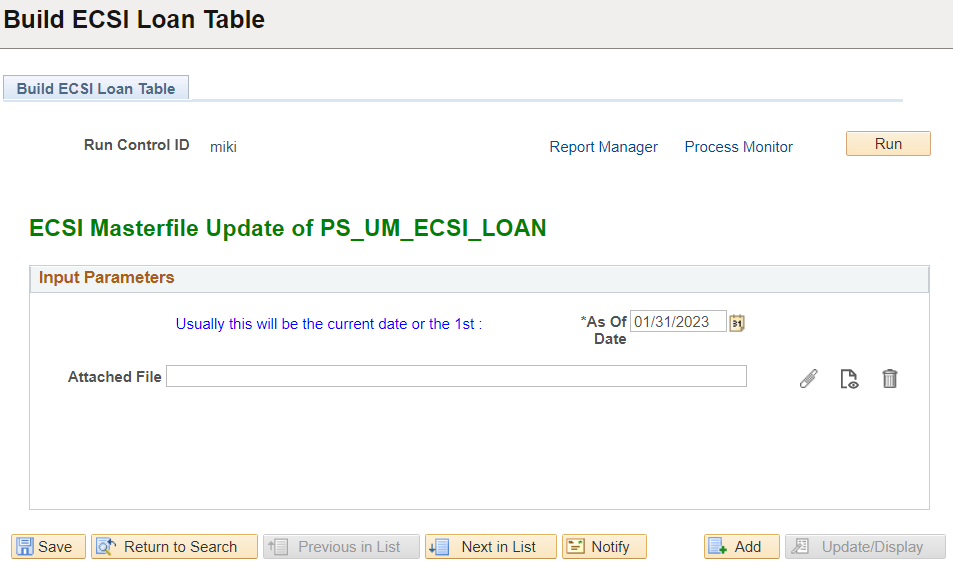
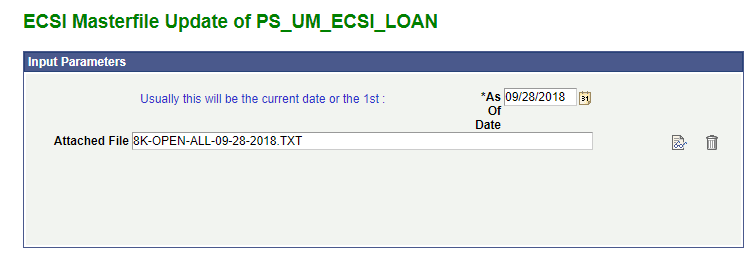
3. Change the "As of Date". This date should be set to match the date in the name of the loan file. It is no longer necessarily the 1st of the month.
Attach File
This will display the name of the loan file once you have uploaded it. There are three icons to the right of this edit box.
- The paperclip allows you to specify a file to use.
- The sheet of paper with glasses allows you to view the uploaded file
- The trashcan allows you to delete the uploaded file.
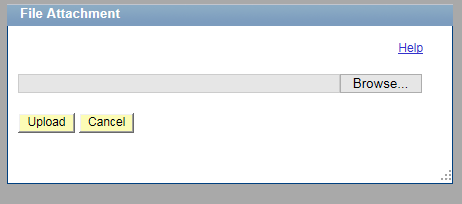
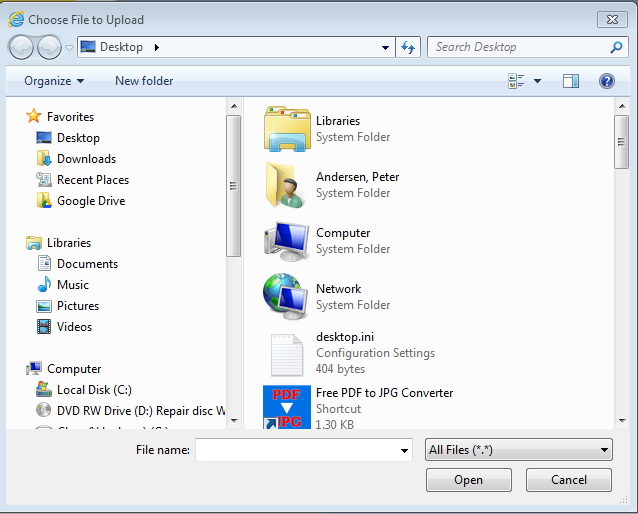
- Click the paperclip and you will see the following:
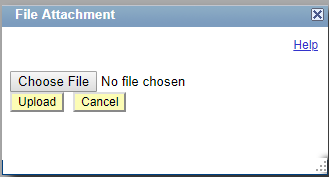
2. Click on the "Choose File" and find the file you downloaded earlier. Click "Upload"
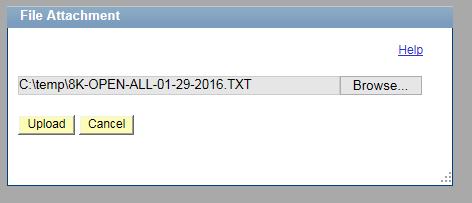
3. The file name and path now appears:
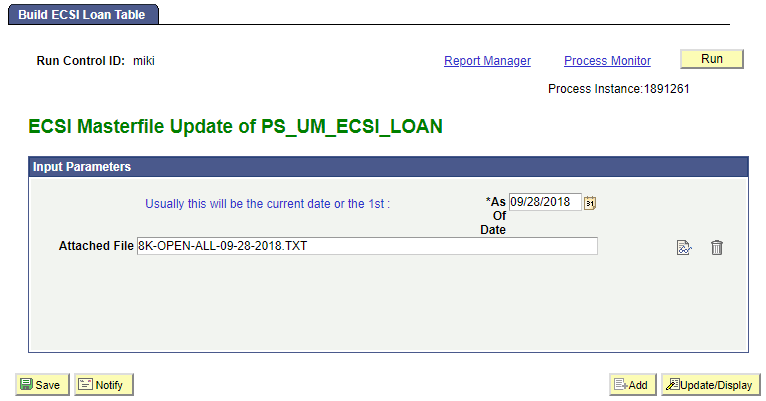
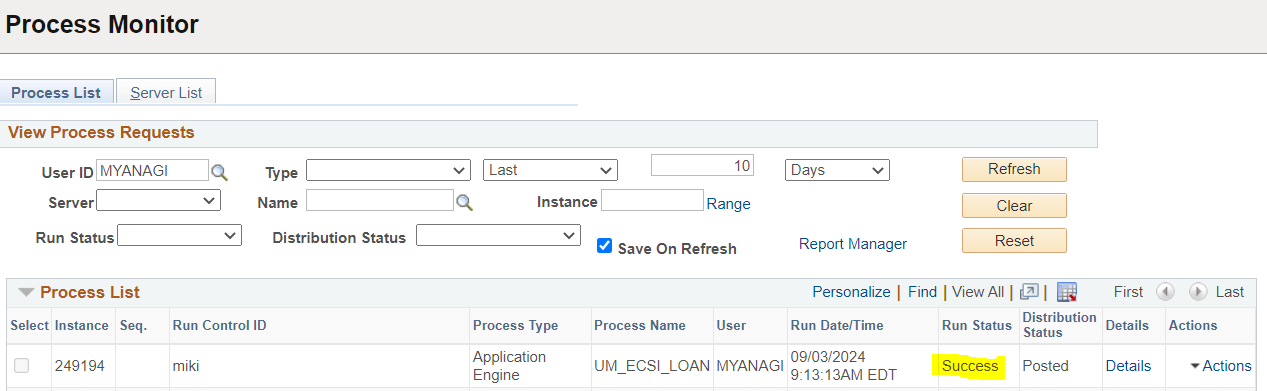
4. Click "Save" and "Run". Click "OK" on the pop-up window. Go to "Process Monitor" and wait till the "Run Status" becomes "Success". (It could take longer than 20 minutes.)
5. Once the jobs are run you should check the record count in the ECSI loan table using:
SELECT EFFDT, EFFSEQ, COUNT(*) FROM SYSADM.PS_UM_ECSI_LOAN GROUP BY EFFDT, EFFSEQ ORDER BY EFFDT DESC, EFFSEQ
If the counts are off, the date is wrong or there is some other problem you can use the EFFSEQ field in conjunction with the EFFDT field to identify the rows for deletion or correction. The EFFSEQ starts with 1 and increments by 1 with every successive update for a given date. The newest file should have a little bit more records than the previous month's file.
6. When the loan table is correctly updated let Jolyn Campbell <jolynn@maine.edu> know with a quick email including the text: "The ECSI loan table has been updated with the MM/DD/YYYY loan file." Enter the date from the ECSI loan file you downloaded.
7. Make sure to delete the file you downloaded on your Desktop.