Some views in Discoverer require annual updating. For instance, PM Budgets vs Annual Distributions uses different "Ps Um Pos Bud vs Ann Dis Vw" for each fiscal year. This page will provide the processes for creating a new, updated view based on the existing view.
![]() DM-27
-
PM Budgets vs Annual Distributions
Closed
DM-27
-
PM Budgets vs Annual Distributions
Closed
- Log in HRPRD Discoverer Administrator and check the box for "HR Report"
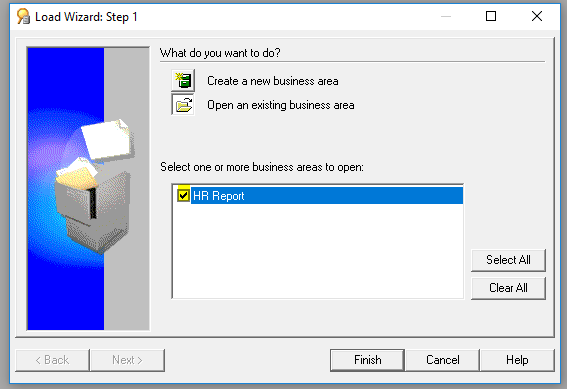
- Expand the HR Report by clicking the '+" and find the most recent view for "Ps Um Pos Bud vs Ann Dis Vw FYXX". Click the view and Edit > Copy and Edit > Paste. It will create new view at the bottom.
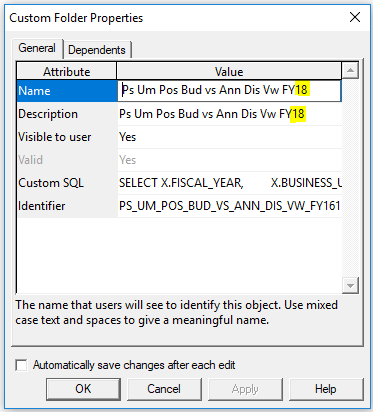
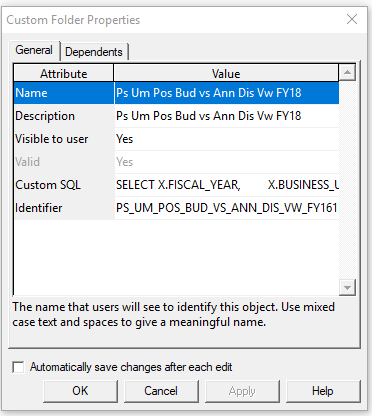
- Right click on the new view and click Properties. Change the Name and Description (You can just use the delete key and type in the box.)
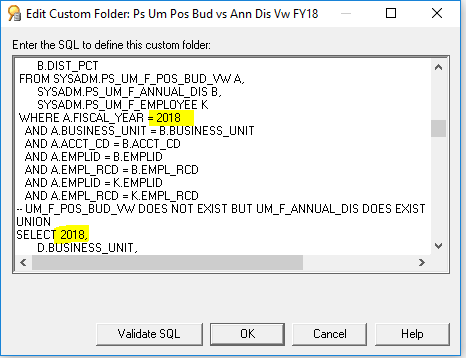
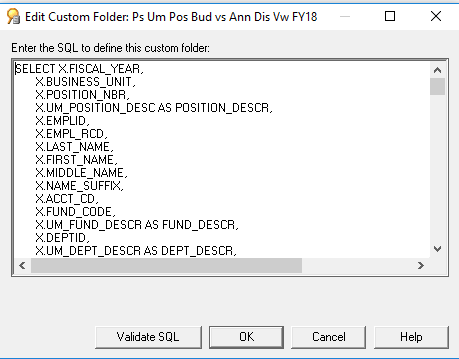
- Click Custom SQL and a new window will open. Find the year you need to change. In this example, find 2018 and change it to 2019. After modifying them, copy and paste all to notepad and make sure you didn't miss any fields by using the "search" function. In this example, there were five locations requiring update. Click Validate SQL and you should get "The SQL string is valid" message and click OK. Click Apply and click OK.
5. Close Discoverer Administrator
--The step below is about creating new report in Discoverer--
- Open two Discoverer windows. (Open one and open another one.) For the first one, open "PM Budgets vs Annual Distributions FY18" report (File > Open > Database > PM Budgets vs Annual Distributions FY18). Go to Sheet > Edit Sheet. Leave the screen as is. We will need it later for comparisons.
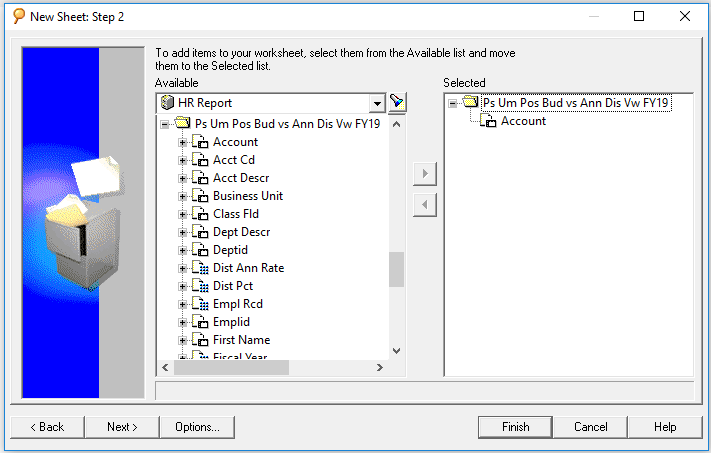
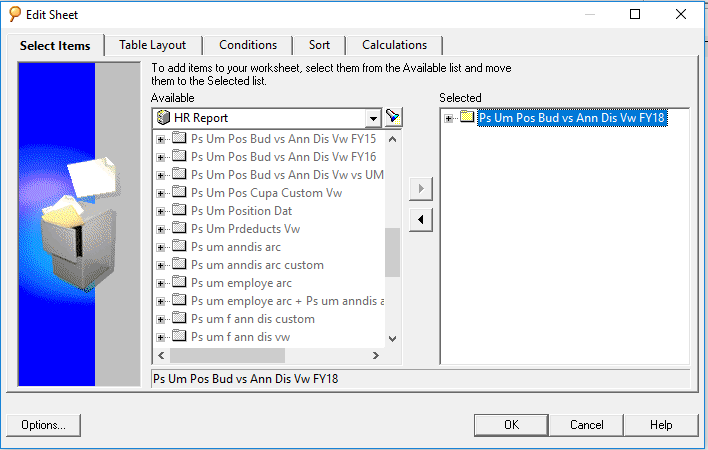
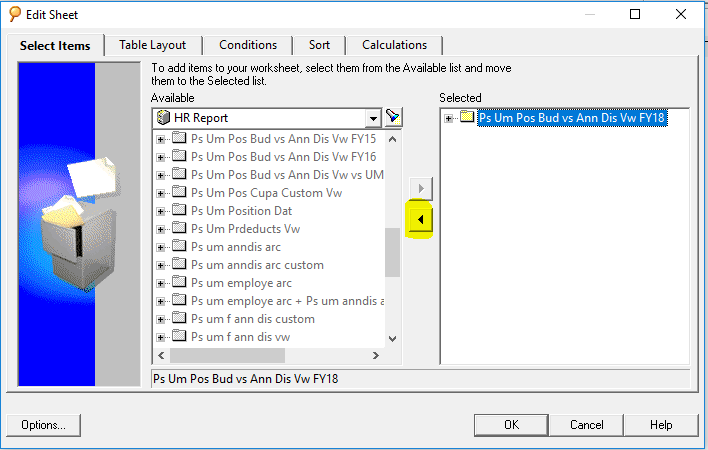
- Open the second Discoverer window and go to File > New. Click Next. Expand the new view and add the new field by dragging the items one by one from the new table. Looking at the first Discoverer window helps ensure you are adding all fields. Click Next when you finished adding the fields.
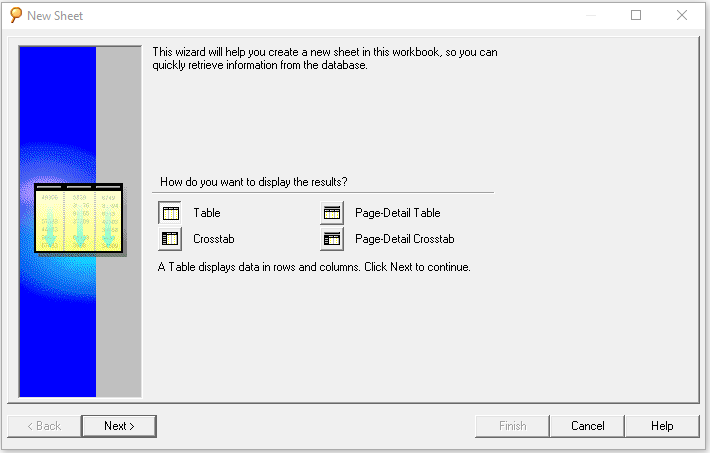
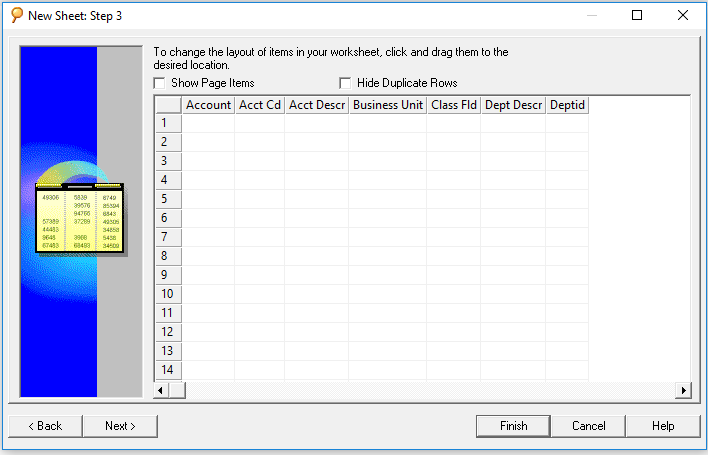
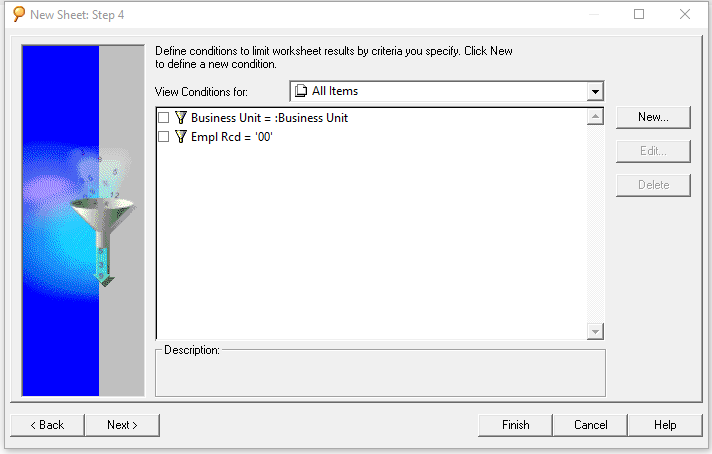
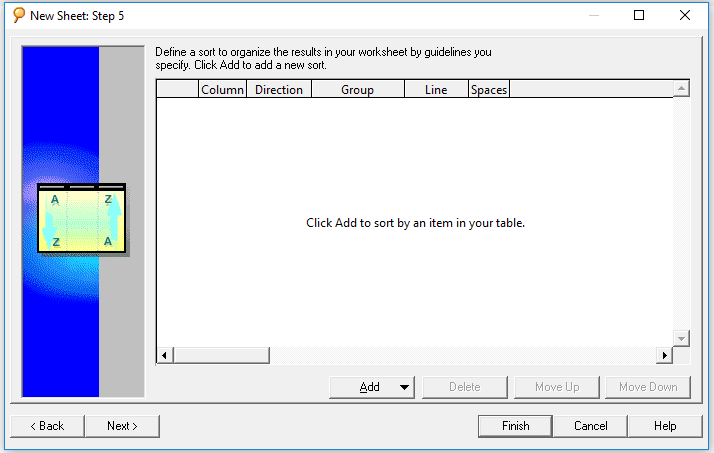
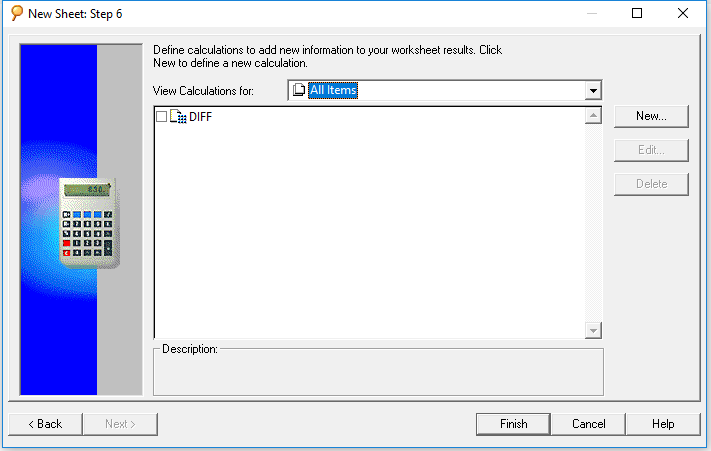
- Change the order of the columns by dragging the column and click Next. Add conditions and click Next. (You might have to set up new parameter for the prompt.) Add sorting order and click Next. Add calculation and click Finish. Again, do these steps by comparing with the previous report (The first Discoverer window.)
- The report will automatically run.
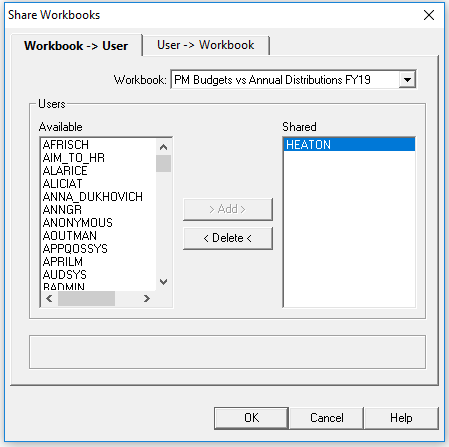
- Save the report with new name (use "Save As") and share with the users. (File > Manage Workbooks > Sharing.)