Before installation
Make sure that Viscosity is connected. If not, go to installing Viscosity page.
Step 1: Download Discoverer Files
Create a folder on your C drive called Discoverer to hold the files that you will need to download in the following steps
The link for downloading Discoverer: http://dante.unet.maine.edu/disco/ You’ll need your UMS login and password (same you would use for MaineStreet) to log into this site.
Right click the file, ofm_disco_desktop_win_11.1.1.3.0_disk1_1of1.zip, and choose "Save link as..." or "Save target as" to download it on the Discoverer folder created in the #1.
Right click on Sqlnet.ora, choose "Save link as..." or "Save target as" to download it on the Discoverer folder created in the #1.
Right click on tnsnames.ora, choose "Save link as..." or "Save target as" to download it on the Discoverer folder created in the #1.
Step 2: Install Discoverer
- Go to the Discoverer folder and right click on ofm_disco_desktop_win_11.1.1.3.0_disk1_1of1.zip. Unzip the file by selecting "Extract All" . If the "extract all" option is not available, use '7zip' → 'Extract Here'.
- A window will open with the Disk 1 folder. Double click Disk1, double click install folder, and then double click on win32 folder. Note: The 32 bit version of Discoverer needs to be installed regardless of you are using a 32 or 64 bit version of Windows. The 64 version doesn't work.
For Windows 7: Right click on setup.exe and select "Run as Administrator"
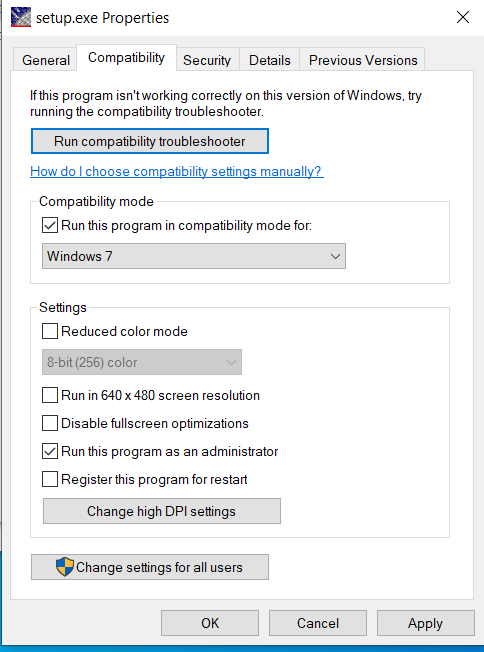
For Windows 8 or above: Go to unzipped folder → Disk1 → install → win32 → right click on setup.exe and select Properties. On the Compatibility tab, check the box for "Run this program in compatibility mode" and choose “Window 7”. Also, check the box for "Run this program as an administrator". Hit "Apply" and "OK". Double click setup.exe and installation screen as shown below will show up.
3. A DOS window will appear and then go away – then the Oracle Install window will appear. NOTE: If you have multiple windows open, the install has a habit of opening behind another window.

Click on Next.

Uncheck Oracle Discoverer Administrator.
Click on Next.

Click Next.

Please note the Oracle Home Directory — you’ll need this folder (11.1 or 11.2) for step 3.
Click Next.

Click on Install.
Wait till successful 100% will appear and then click Next.
Click Finish.
Step 3: Configuring the Oracle Database Connection
You will need to download two more files from https://www.maine.edu/downloads/discoverer/
Go back to C:\ Disocverer and select both sqlnet.ora and tnsnames.ora and copy and paste them on C:\Oracle\product\11.1.1\as_1\network\admin. Replace files with new one if they already exist.
Go to C:\Oracle\product\11.1.1\as_1\bin\dis51usr (with orange lollipop icon), right click and select proprieties. Click on the Compatibility tab and check the box for "Run this program as Administrator'. Click "Apply" and then "OK".
Create Shortcut on Desktop: Right click the dis51usr and select "Send to Desktop".
Step 4: Setup/Run VPN
If you do not already have a VPN created/setup (not typical), please follow the directions to setup/run a vpn account.
NOTE: These steps will need to be followed each time you run Discoverer.
Step 5: Run Discoverer
Run Discoverer by finding All Programs > Oracle BI Discoverer Desktop > Oracle Discoverer Desktop. This should also be run as administrator.
Login with the username and password you were given for Discoverer or DARTS' ID:
For the connect field use one of the following:Financials: ADMAPPS
Human Resources: HRPRD
Advance: ADVANCE
You will need to contact McLean Poulin (mpoulin@maine.edu, 581-5420) in order to get a Discoverer id and password.

DLL File Issues:
Occasionally, once Discoverer is installed and run, you will receive an error saying that msvcr71.dll cannot be found.
When this happens Jeff Jensen will need to share msvcr71.dll and msvcp71.dll that are located on Google Drive. These files need to be copied to c:\windows\syswow64 folder.