Excel files from Discoverer
When outputting reports from Discoverer into Excel, be aware that apparently blank fields do, in fact, contain SOMETHING. It is not relevant data and it is not visible, but it is able to be selected. To remove this unwanted data (which Excel WILL include in counts):
- Select a "blank" cell and copy (Ctrl+c)
- Do a find (Ctrl+f) and choose the replace tab
- Paste the contents (Ctrl+v) into the "Find what" field and leave the "replace" field blank
- Click "Replace All"
Exporting Discoverer Query results and retaining most of the formatting.
File > Export (NOT Export to Excel)
- Choose Table Format of htm
- Choose desired Destination
- Choose desired File Name
Once exported then open Excel and browse for the file. It will not open if you click on it. Save as an Excel workbook.
Do not worry if you get a warning message when you save the file. Simply hit Continue to save the file after the warning message appears.
Make sure all number formats do not contain <1,000,000> to represent minus numbers.
Highlight duplicate values
Choose Home > Conditional Formatting > Highlight Cells Rules > Duplicate Values
Opening CSV files in Excel from any tool
- When opening in Excel directly, leading zeroes are deleted from fields such as EMPLID. Adding them back causes them to be read-only.
- To ensure the leading zeroes are functional, follow these instructions:
- Open Excel
- Select a new blank workbook
- From the "Data" tab at the top, select Select External Data From Text.
- Browse for your desired .csv and click "Import." The following screen appears. Make sure delimited is selected and click to include headers. Click" Next."

- Deselect "Tab" and select "Comma." You will notice the Data preview will change to columns. Click "Next."

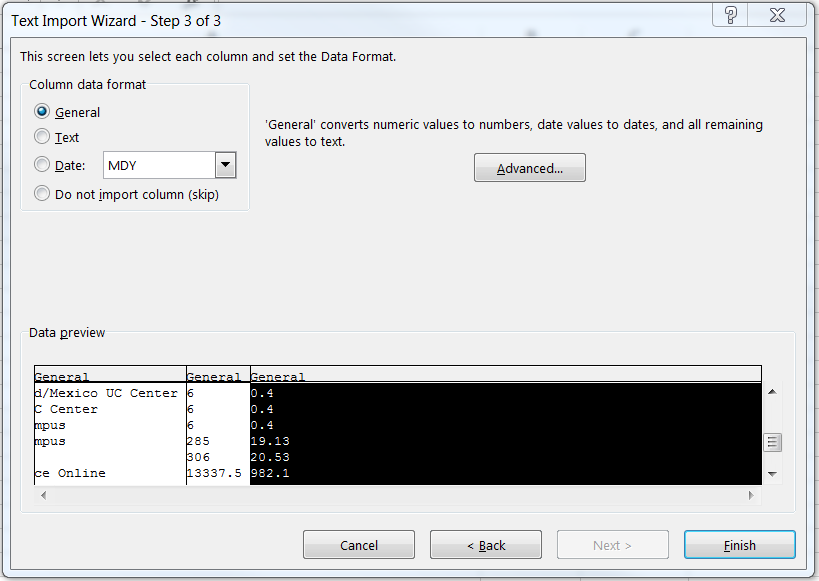
- In the next step, the first column field will be highlighted. Click on the field header that should contain the leading zeroes and click on "Text."

- In the final box, click "OK."
Easily convert xls to xlsx
When downloading Excel files from PS, you note that they are all xls format. You can convert the file without creating a second file of the same name.
Go to the File tab. This brings you to a new page. The very top icon says "Convert." Click it and it will change your xls to an xlsx file.
Creating Subtotals in Excel
Click this link to review the subtotal function in Excel.
Creating Pivot Tables
Excel 2013 - Pivot Tables Training
A. Getting Started
B. Creating & Deleting
C. Custom Appearance & Layout
D. Printing Options & Copying a Pivot Table
E. Summarizing with Totals & Formulas
F. Refreshing Data
G. Pivot Charts
H. Sparklines and Slicers
Change the source data for a PivotTable
From Microsoft Office Support.
Excel for Office 365 Excel 2019 Excel 2016 Excel 2013 Excel 2010 Excel 2007
After you create a PivotTable, you can change the range of its source data. For example, you can expand the source data to include more rows of data. However, if the source data has been changed substantially—such as having more or fewer columns, consider creating a new PivotTable.
You can change the data source of a PivotTable to a different Excel table or a cell range, or change to a different external data source.
Click the PivotTable report.
On the Analyze tab, in the Data group, click Change Data Source, and then click Change Data Source.
The Change PivotTable Data Source dialog box is displayed.Do one of the following:
To change the data source of a PivotTable to a different Excel table or a cell range, click Select a table or range, and then enter the first cell in the Table/Range text box, and click OK.

To use a different connection, do the following:
Click select a Use an external data source, and then click Choose Connection. NOTE, if "use an external data source" is grayed out, the PivotTable may not have been initially created using an external source and you may have to recreate it.
The Existing Connections dialog box is displayed.

In the Show drop-down list at the top of the dialog box, select the category of connections for which you want to choose a connection or select All Existing Connections (which is the default).
Select a connection from the Select a Connection list box, and then click Open. What if your connection is not listed?
Note: If you choose a connection from the Connections in this Workbook category, you will be reusing or sharing an existing connection. If you choose a connection from the Connection files on the network or Connection files on this computer category, the connection file is copied into the workbook as a new workbook connection, and then used as the new connection for the PivotTable report.
For more information, see Manage connections to data in a workbook.
Power Pivot - adding PowerBI DAX Measures to Excel Pivot Tables