How to Personalize your MaineStreet Experience
Following are some examples of how to personalize your experience in MaineStreet 9.2.
NOTE: you must have the correct role in CS enabled in order to use this functionality.
- Control which is your primary Homepage
- Add a component to your Homepage
- Delete a component you added to your Homepage
- Order the tiles on your Homepage
- Add a component to your NavBar
- Remove a component from your NavBar
- Add a component to your My Favorites
- Remove a component from your My Favorites list
Control which is your primary Homepage
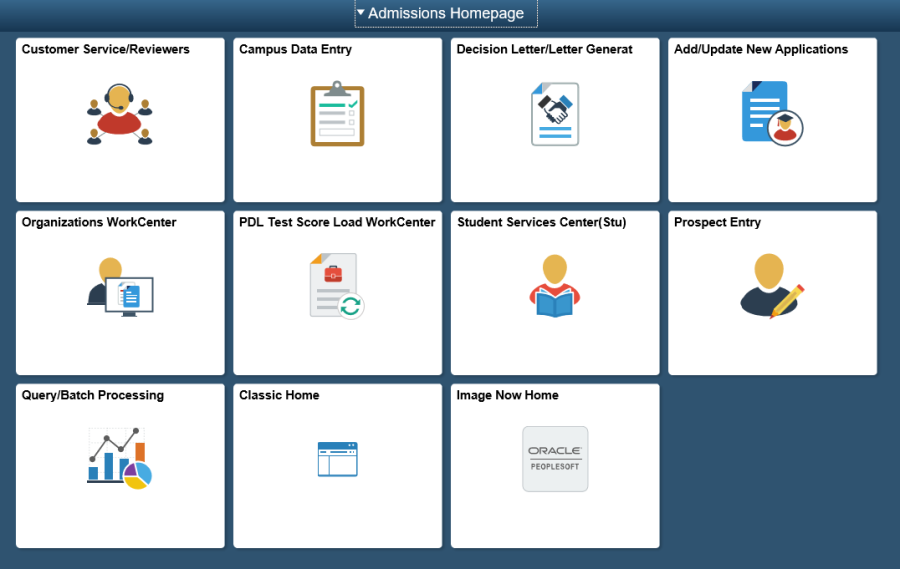
When you first log into MaineStreet, or when you click on the Home  button, you will be presented with a Homepage. You can define which is your primary Homepage by following these simple steps.
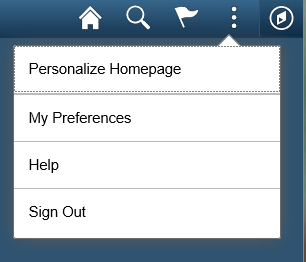
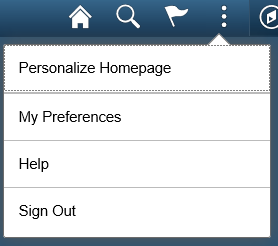
- Click on the three dots and then Personalize Homepage

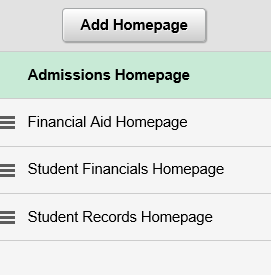
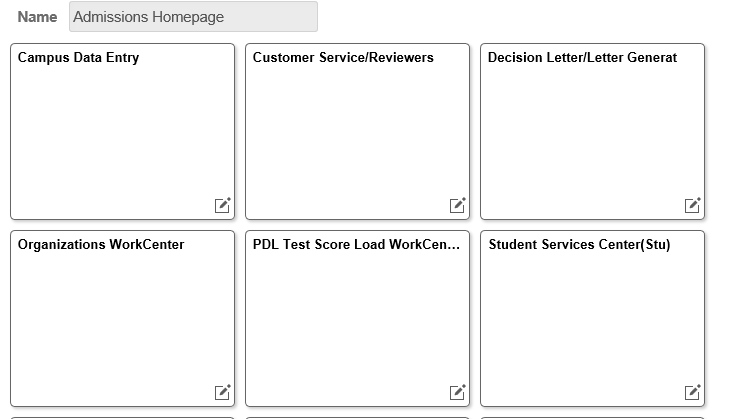
- On the left side of your screen, select the Homepage you want as your default and slide it to the top of the list.

- Click the Save
 button on the top right side of the page. This functionality will also let you order your Homepages. Simply slide the pages in the order you would like them to display and hit Save.
Add a component to your Homepage
If you use a component on a regular basis and don't want to click on a tile or navigate to it using the Navigator icon, you can add it as a tile on your Homepage. This new tile will only display on your Homepage and not effect anyone else's.
- Navigate to the component you would like to add to your Homepage. In this case I will add the ImageNow linking component.

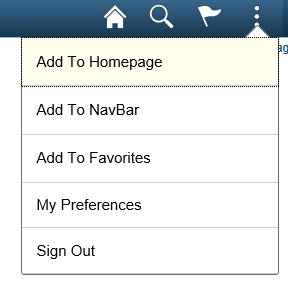
- Click on the three dots and select Add to Homepage

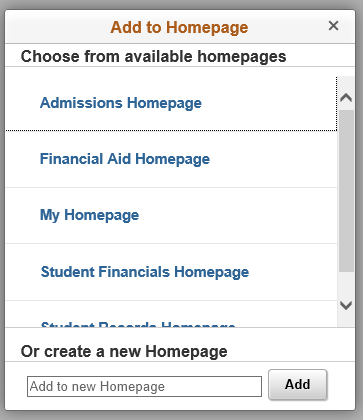
- Select which Homepage you would like to add this to.

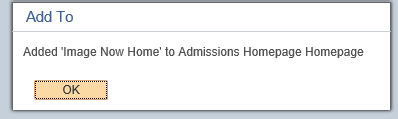
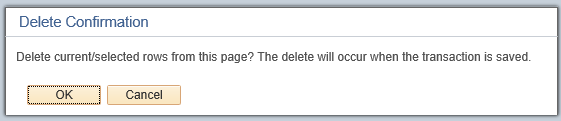
- If done correctly this message will display. Click the OK button.

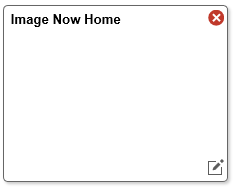
- Here is how it will display on your Homepage. Before, without the new tab

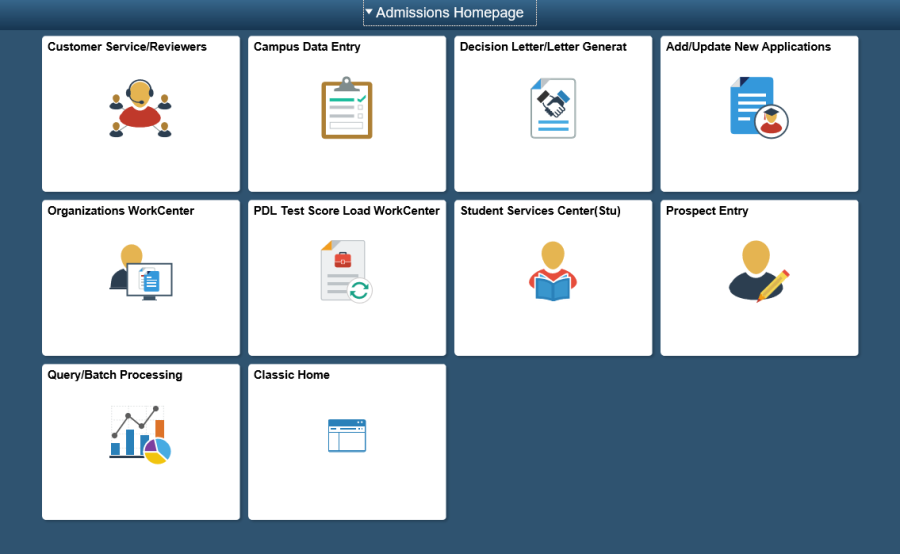
- After, with the new tile added

Delete a component you added to your Homepage
To delete a tile you added to your Homepage, follow these steps.
- Navigate to the Homepage you want to update.
- Click on the three dots and select Personalize Homepage

- Click on the red X for the tile you would like to delete.
- Click the Save button.
Order the tiles on your Homepage
Users also have the ability to order the tiles that appear on their Homepage. This may be useful if there are one or two particular tiles you use on a regular basis and want them to appear first on the page. In this case we will move the Campus Data Entry tile to the first spot.
- Navigate to the Homepage you want to update.
- Click on the three dots and select Personalize Homepage
- Click on the Campus Data Entry tile an drag it to the first spot.

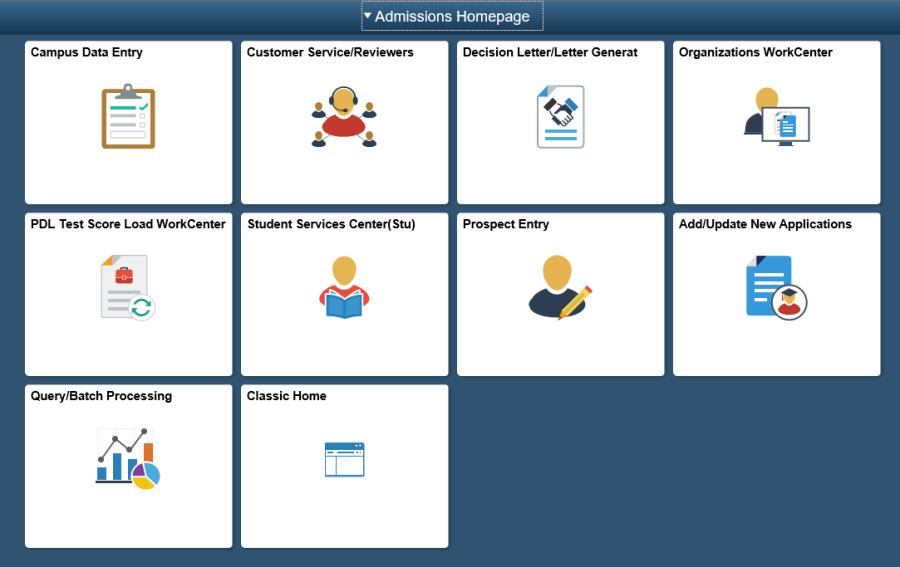
- Click the Save button. The tile will now appear first on your Homepage.

Add a component to your NavBar ![]()
In some cases you may want quick access to a component but do not want it to appear as a tile on your Homepage. One option is to add it to your NavBar.
- To add to your NavBar, navigate to the component you want to save. In this case we will add the ImageNow linking component.
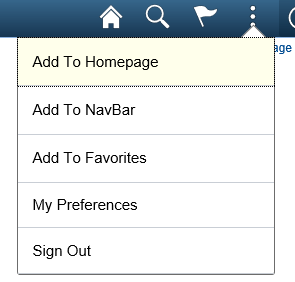
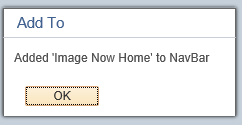
- Click on the three dots and select Add to NavBar

- If done correctly this message will display. Click the OK button.

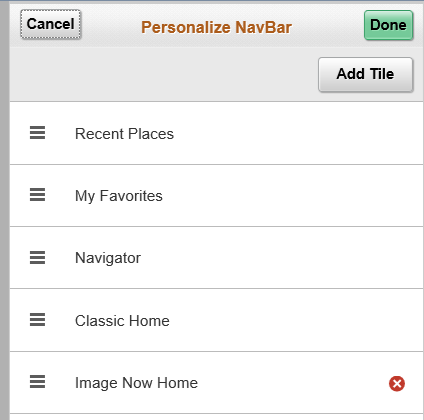
- The new component will now appear in the NavBar list.

Remove a component from your NavBar
To delete a component you added to your NavBar, follow these steps.
- Click on the NavBar icon

- Click on the Settings icon

- Click on the red X next to the component you want to remove.

- Click on the Done button. Note, you can also reorder the items in this list by dragging and dropping in the order you would like them to display.
Add a component to your My Favorites
Another option for saving components you use on a regular basis is to save them to your My Favorites list.
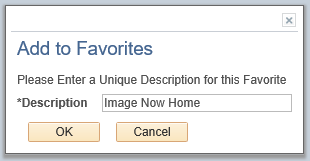
- To add to your My Favorites, navigate to the component you want to save. In this case we will add the ImageNow linking component.
- Click on the three dots and select Add to Favorites.
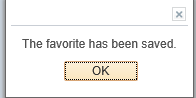
- If done correctly this message will display. Click the OK button – twice.


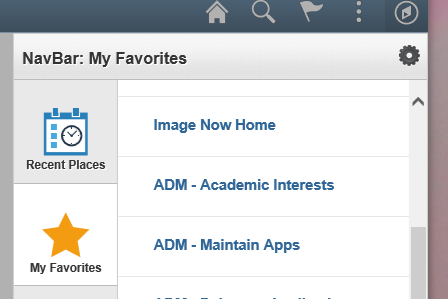
- The link to the component will now appear in your My Favorites list.

Remove a component from your My Favorites list
To remove a component from your list of My Favorites, follow these steps.
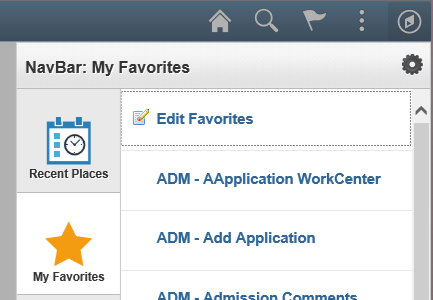
- Click on the NavBar icon , then My Favorites and Edit Favorites

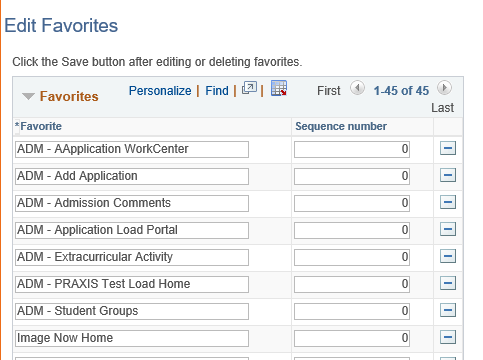
- A list of all your saved favorites will appear. Click on the minus icon
 for the component you want to delete. In this case we will delete the Image Now Home favorite.
- A message will display asking you to confirm this request. Click OK.

- Scroll to the bottom of the page and click the Save button.