If you have a query that is returning too large a dataset (too many rows are being returned and you cannot see them all), or takes too long to run, you can schedule it to run by submitting a process request in the scheduler. Additionally, if you want a query to run regularly, you can set a schedule in the Scheduler.
Submitting Process Requests
To submit a process request, navigate to MyCampus > MaineStreet > Enterprise Applications > Your Desired Database > Reporting Tools > Query > Schedule Query
If you are already in Query Manager or Viewer, search for the query you would like to schedule, and click "Schedule" in the Schedule column to the right of the query name.

Creating a Run Control ID
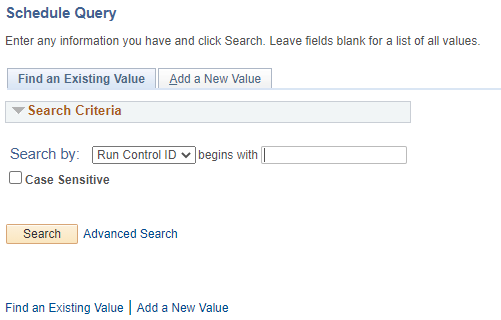
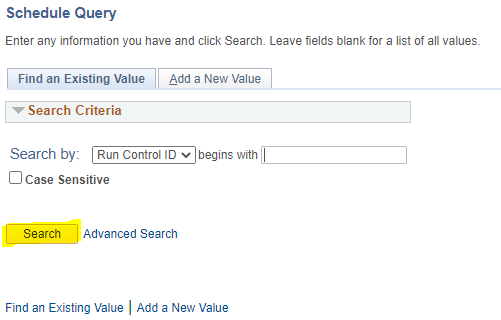
If you already have a Run Control ID, click "Search" and it will show a list of your IDs. Click the desired Run Control ID and proceed to "Schedule a Query."

The first time you schedule a report, you must create a Run Control ID. Run Control IDs are used whenever a process is run in PeopleSoft. They allow you to create, save and reuse a list of reports. You will only see the Run Controls which you created.
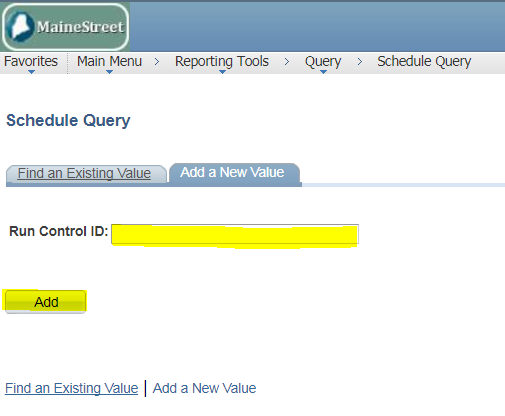
Click "Add a New Value" to create a new ID. Enter a name for the Run Control ID. You can use up to 30 alpha numeric characters (DO NOT use spaces). Additionally, you can never delete a Run Control ID, so try to only create them when needed.

Click "Add" to go to next step.
Schedule a Query
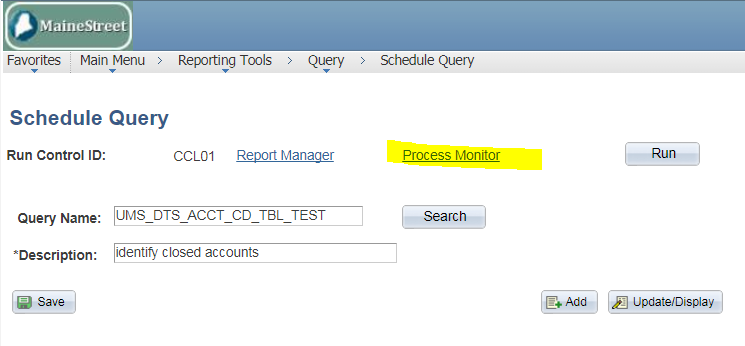
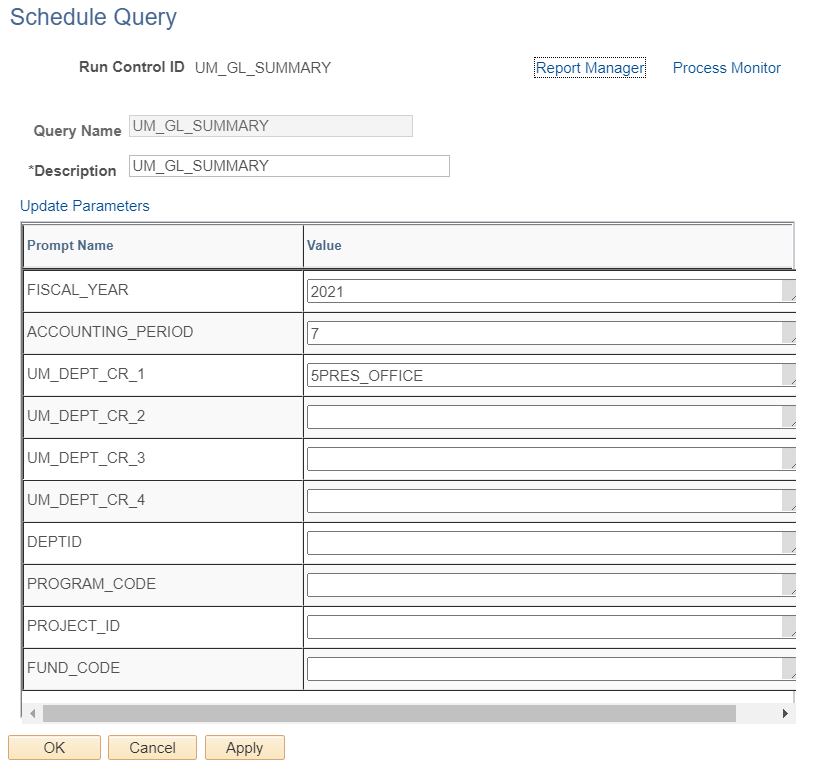
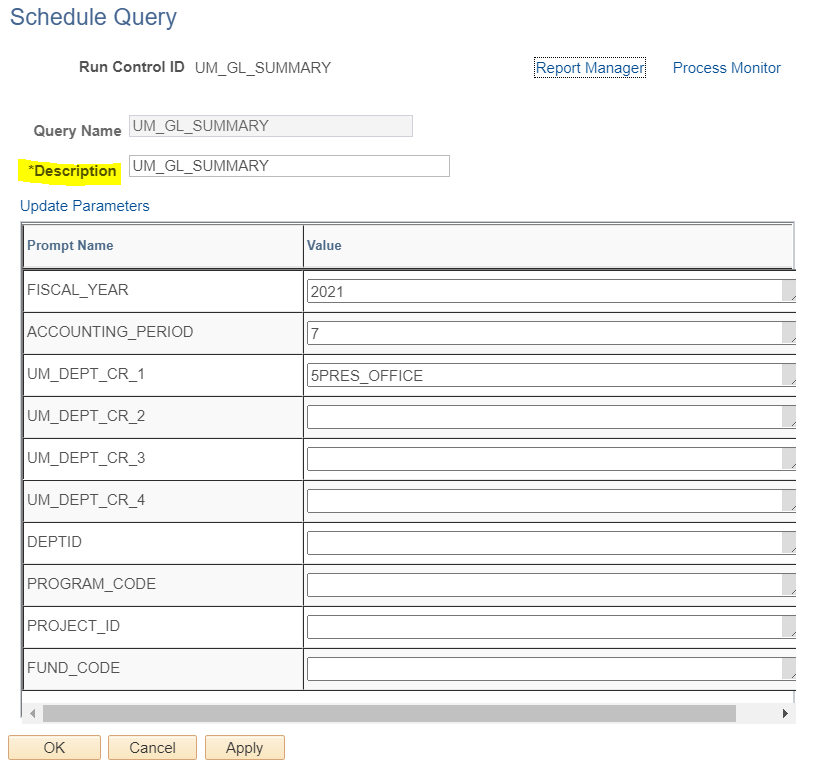
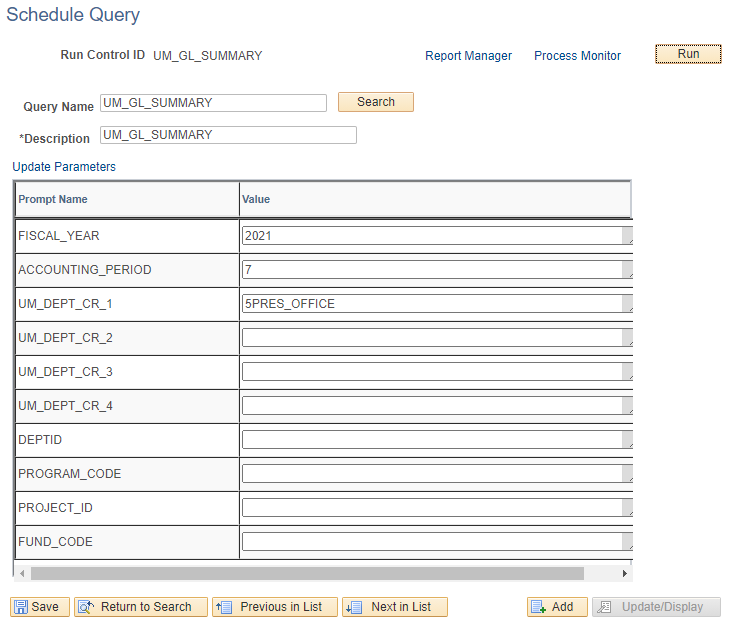
On the "Schedule Query" page, you should enter a "Description". Also, you can set parameters if the query has prompts. Click "OK" to go to the next step.

If you see the screen below, click "Run" to go to the next step.

You can also Schedule a Query to run on a set schedule (once a month, every day, etc.) using the "Recurrence" dropdown, and it can deliver an email to notify users when the query results are available.
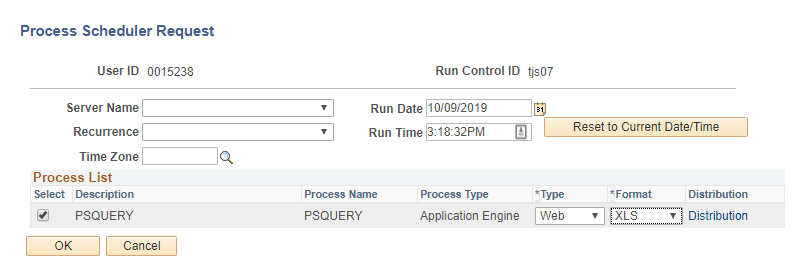
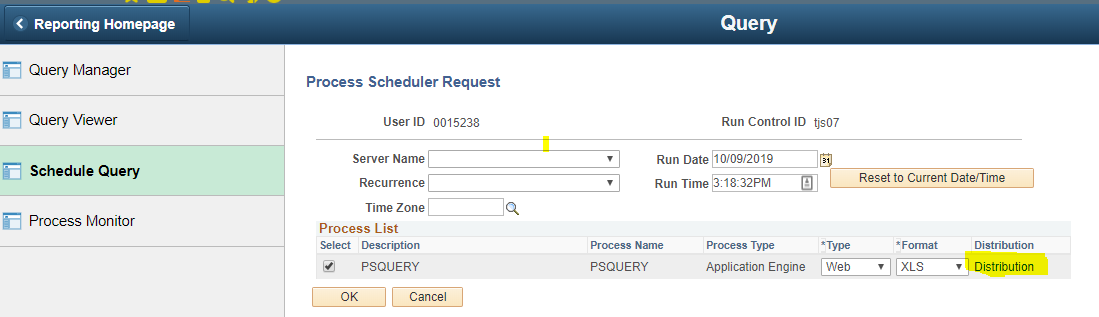
Process Scheduler Request
Viewing output from a batch process is PeopleSoft is typically limited to the person who submitted the process or to an ID with special privileges. There is, however, a way for a user to inform others that a process has run and in some cases, to view the output of the process.
Format Row Limits
You can change the Format of the output you desire by selecting from the drop down menu under "Format". The default format output is TXT. Frequently, reports are run in XLS format and opened with Excel. Please be aware, the row limit for xls files is 65,536. XLSX format row limit is 1,048,576, however it is not available as a Format option. There are no row limits on the txt option which creates a csv file that can also be opened with Excel.
You can also Schedule a Query to run on a set schedule (once a month, every day, etc.) using the "Recurrence" dropdown, and it can deliver an email to notify users when the query results are available.
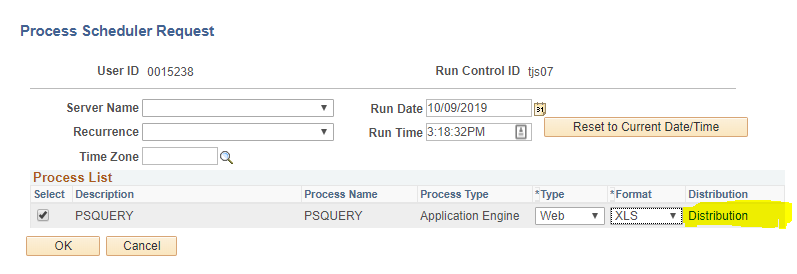
Choose "Distribution" to create the email that will send the finished report to the specified recipients.

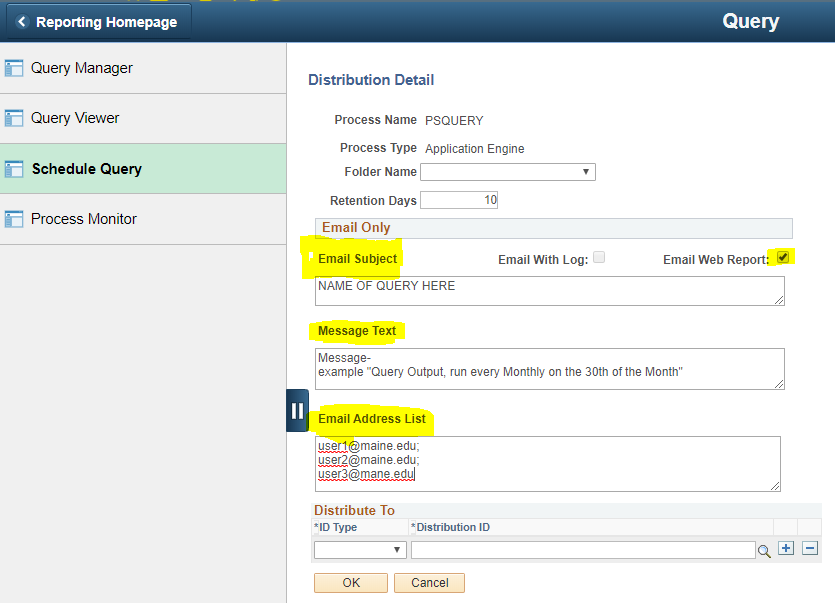
When that is selected, a screen like the "Distribution Detail" page will be shown. The "Email Web Report" checkbox must be selected in order to sent out an email with a link to the report.
The 'Email Subject' and 'Message Text' information should be filled. The 'Email With Log' checkbox is a special case to also include a link to an SQR Log file when appropriate. This usually remains unchecked.
The behavior of 'Email Address List' in conjunction with 'Distribute To' deserves special mention. If 'Email Web Report' is checked then the people in the 'Distribute To' list are sent an email if their ID has an email associated with it. If 'Email Address List' is also populated, those recipients are in addition to the ones in the 'Distribute To' list. A person in both fields will get two emails. However, only a person in the 'Distribute To' list can successfully view the output. A recipient in the 'Email Address List' who is not in the 'Distribute To' list will get the email, but will not be able to successfully click on the included link. So if there was value in letting someone know that the job ran, but not allow them to see the output, they would be in the 'Email Address List' but not the 'Distribute To' list.

Recipients in the Email Address List must be separated by a semicolon (;) and one space. Do not put recipients on separate lines.
By default, the 'Distribute To' contains the id of the submitter, but more can be added. All those in the 'Distribute To' list can view the output of the process, but if nothing else is checked on the page, they would have to know to look for the output.
Each user will receive an email with a live link to retrieve the query output. The user must be logged in to MaineStreet to retrieve the output. A person who is not already logged in, or who doesn't have authority to view the file, will get thrown to the default logon screen for that system. Since that is not the MaineStreet Portal login screen that users are required to log in from, login is not allowed from that screen. So the only way to view the output of the report is for the user to be authorized (by being in the 'Distribute To' list) and be logged into the system already when clicking on the link. Note that if your query does not run properly, you will still receive an email, however it will not contain the intended data.
When finished, click OK to go back to Process Scheduler Request.
Click OK again on the "Process Scheduler Request" window.
Process Monitor
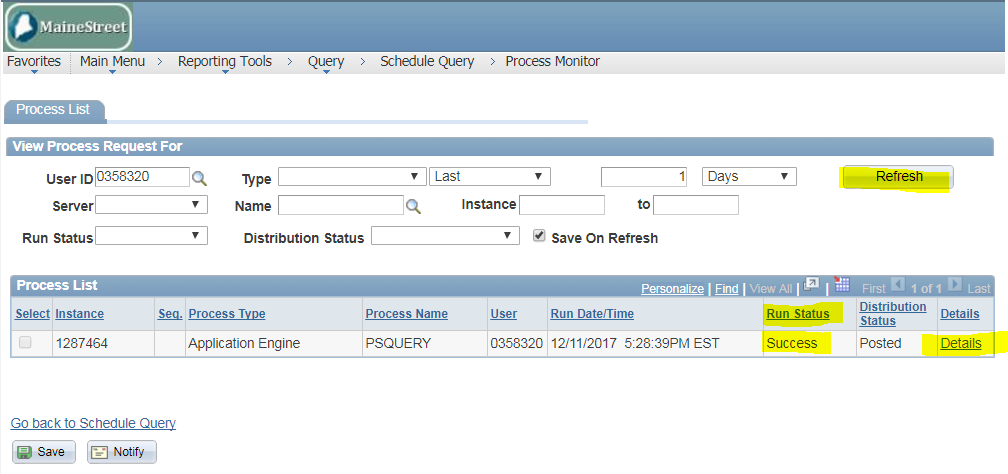
Click Process Monitor on Schedule Query page.

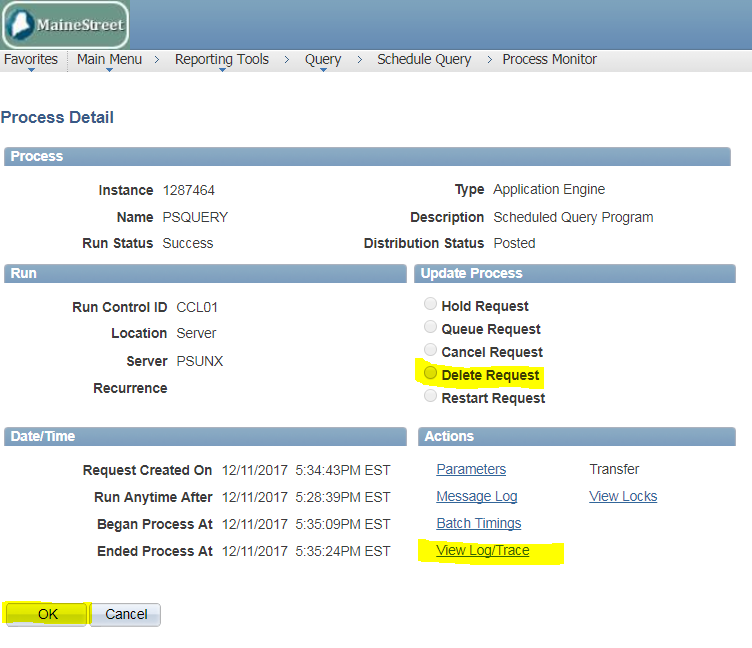
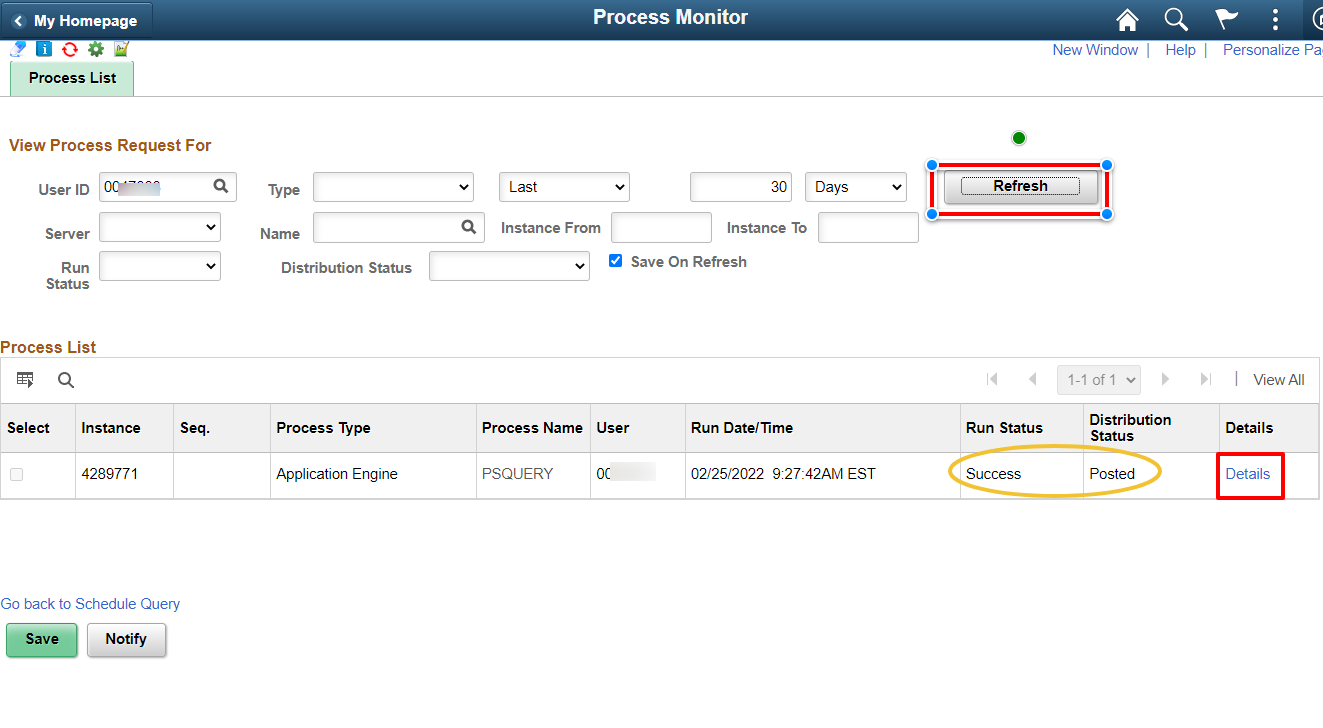
In the Process List, you will see your report. Keep an eye on the Run Status column as it moves from Queued through Processing to Success. Click Refresh to see the most current Run Status. Once the report become Success and Distribution Status become Posted, click Details.

Click on View Log/Trace to see the report results.
(Here is also where you can choose Delete Request to delete reports or Cancel Request you no longer require to keep in your process monitor.)

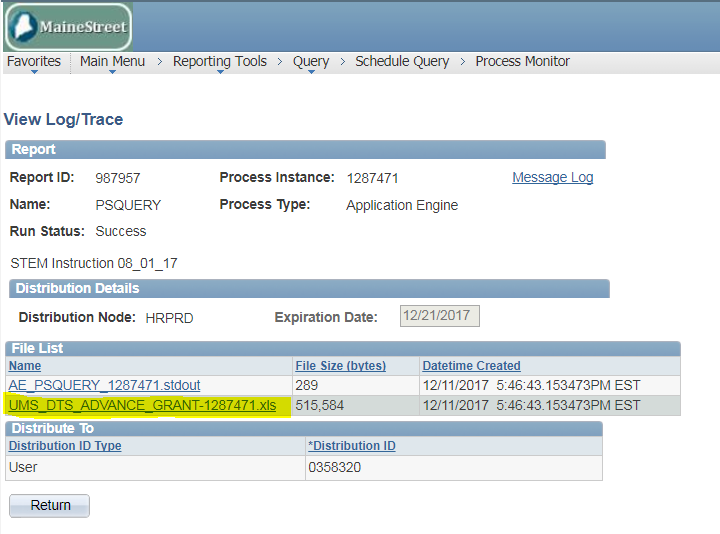
On the View Log/Trace page, click on the file that has the format you chose earlier to open and view your results.

You can leave a report running and return to the Process Monitor any time to check progress. For ease, add the process monitor page to your favorites by clicking Favorites in the upper left of your screen and choosing Add to Favorites.
HELP IS AT HAND!
 Question, comment, critique? We are here to help and we strive to make our site a comprehensive, user friendly experience. Contact us at DARTS@maine.edu.
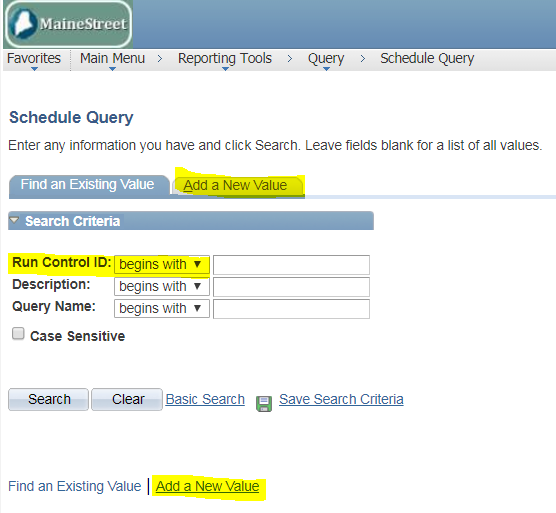