This page shows the overview of Power BI report creation. The best practice is to build a reusable dataset in Power BI instead of simply copying .pbix file and changing the visuals. It may not be the case for all solutions, but we highly advised to use reusable dataset effectively.
If you haven't go through the steps #1-5 on Power BI for Report Authors page, please do so.
- Open Power BI Desktop. Decide if you are creating a new dataset or new report.
- Choose data connection. There are multiple ways to connect to data, so please choose the most effective way depending on your availability.
- Power BI Dataset: If you have an access to exiting dataset in a Power BI Service Workspace, use the instructions on Connect to Dataset on Workspace
- Data Source Files (Excel file, CSV file, etc.): If you have a data source file stored in Power BI HUB SharePoint Library, use the instructions on Connect to Data Source file
- Repeated Data Files: If you have multiple data source files with the same structure stored in Power BI HUB SharePoint Library, use the instructions on Connect to Multiple Data Source Files
- Direct Connection to Database: The access is very limited. Please Contact us at DARTS@maine.edu.
- Create visuals depending on a decision made on step #2.
- Creating a new Dataset: If the dataset will be reusable, you can create only the dataset. The visual can be very simple since the actual report creation occurs in the separate .pbix file.
- Creating a new Report:
- If the dataset is not reusable, you will create dataset and report together in the same file. When you publish the file, it will be your report.
- If you are connecting to an existing dataset, you will be creating a report file in this process.
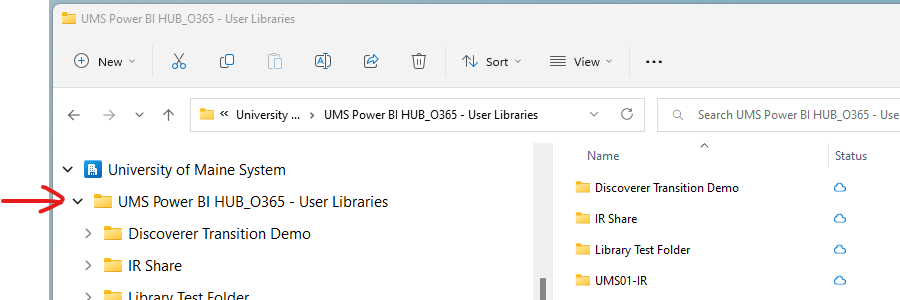
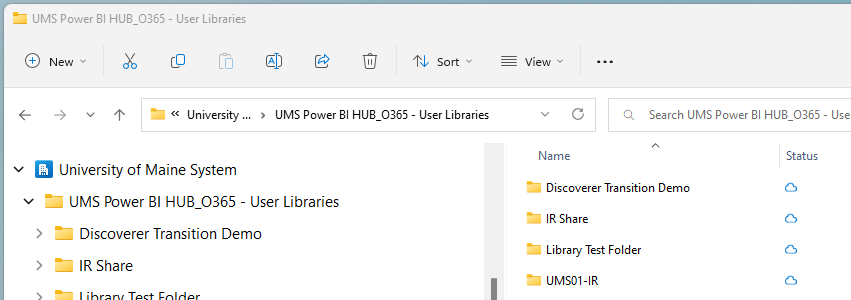
- Save your report as a PBIX file in the Power BI HUB SharePoint folder for version and source control. If you don't have Power BI HUB SharePoint library , please submit Power BI HUB SharePoint Library Request.
Make sure your desktop and SharePoint folder are synced. If not, please see Sync SharePoint User Libraries to Your Computer for instructions.
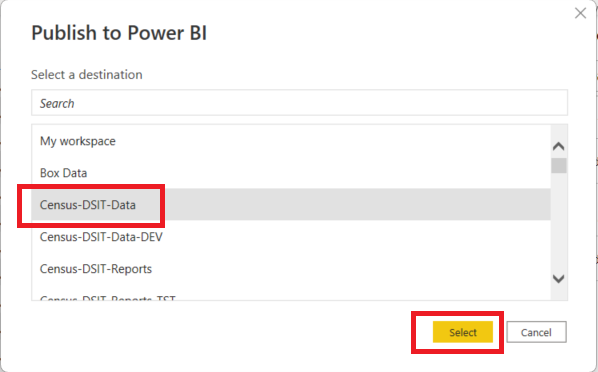
- Click "Publish" to publish the report to a Power BI Service. (Make sure you were signed in)

- Choose the appropriate workspace. We are not recommended to use "My workspace". If your department does not have a workspace, please submit Power BI Workspace Creation Request.
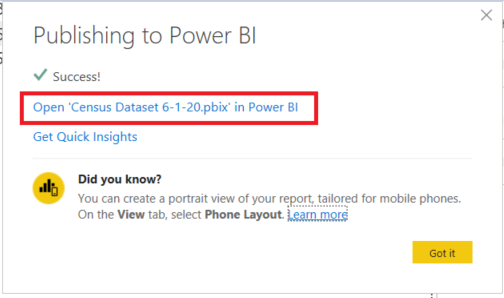
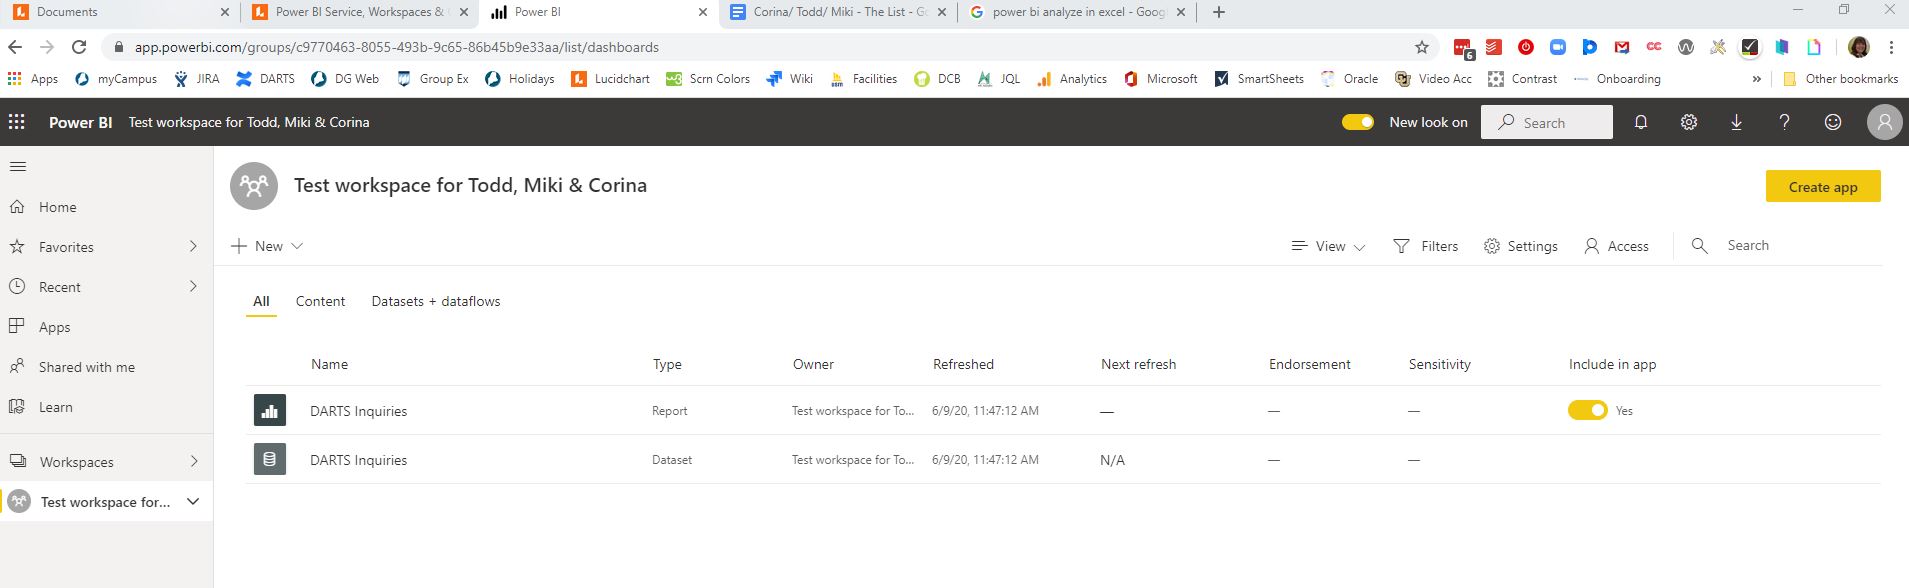
- Once your report is published, click the link on the pop up window which will take you to the workspace in Power BI Service.

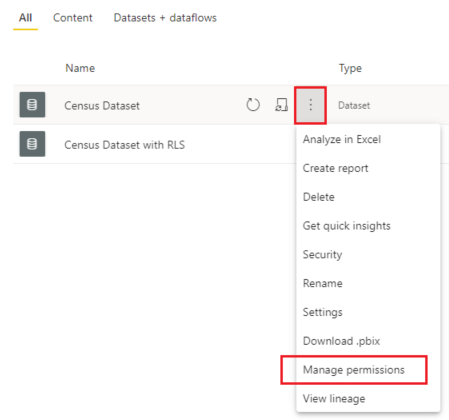
- You will see both a dataset and a report in the workspace. This split happens automatically even if you were to create Dataset only.

- If you were creating dataset file, configure the permission for other users. Click the ellipses next to the dataset and choose "Manage Permissions." Please read Managing Dataset Permissions page for more information. If you don't know who the other users yet, come back later.

- If you were creating a dataset file, now you are able to create a report with connecting to the new dataset you just created. Go back to Step #2 and use Connect to a Dataset in a Workspace on step #3. Then, follow the steps #4-#9 above.

HELP IS AT HAND!
 Question, comment, critique? We are here to help and we strive to make our site a comprehensive, user friendly experience. Contact us at DARTS@maine.edu.