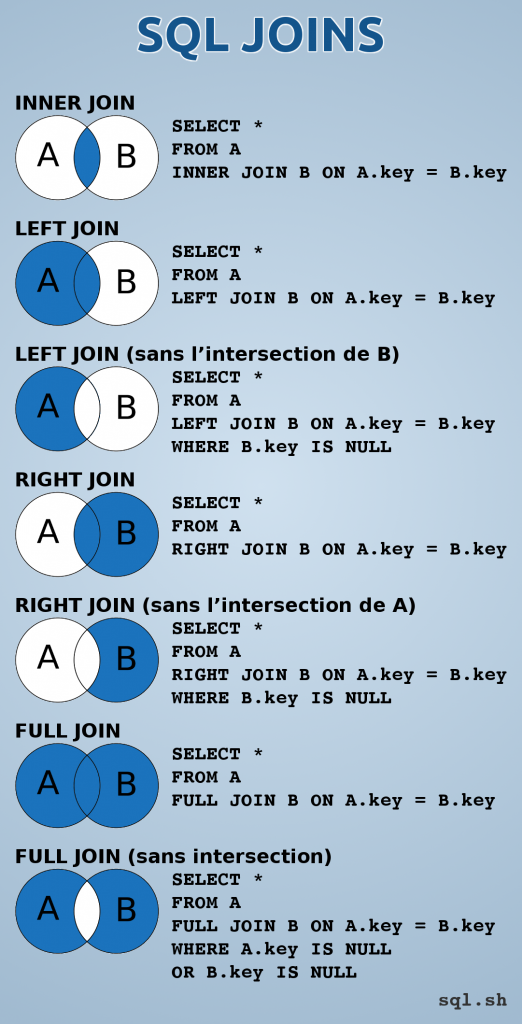
Please read Join Types page for basic concept and types of join.
Types of Join Procedures
To assist users in using query joins, PeopleSoft delivers a number of predefined joins. Because these types of joins are predefined, you do not have to add any criteria to manually link the records.
- Record Hierarchy join has a one to many relationship. They use records that are parents or children of each other. A child table is a table that uses all the same key fields as its parent, plus one or more additional keys. The parent record in PeopleSoft Application Designer defines the hierarchical relationship.
- Related Record join has a one to one relationship. They use records from non-hierarchical records that are related by common fields. The prompt table edit defined for a field in PeopleSoft Application Designer determines the relationship between the records.
Not all records have a parent/child relationship or automatically joined record may not work as you wish. Query Manager allows you to join any table.
- Any Record join must be done manually. It will attempt to automatically show join criteria which may or may not be correct. It is very important to understand the record structure. This is recommended for joining tables.
Procedure
In this example, the Records Office staff has asked you to generate a report with class meeting information. You will use three records to build this query utilizing a record hierarchy join and a related record join.
Find tables before you start creating a new query. If you don't know the table name, see Finding Your Data page for finding table. In this example, CLASS_TBL will be added first (Record A), and then CLASS_MTG_PAT table will be joined (Record B). Additionally, FACILITY_TBL (Record C) will be joined.
Add first table (Record A)
Step | Action |
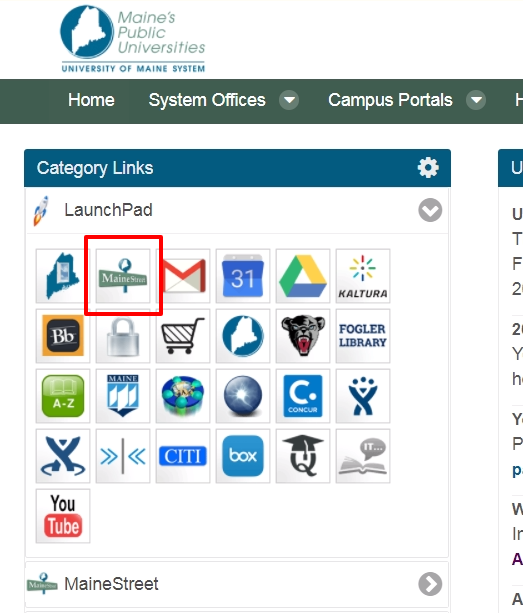
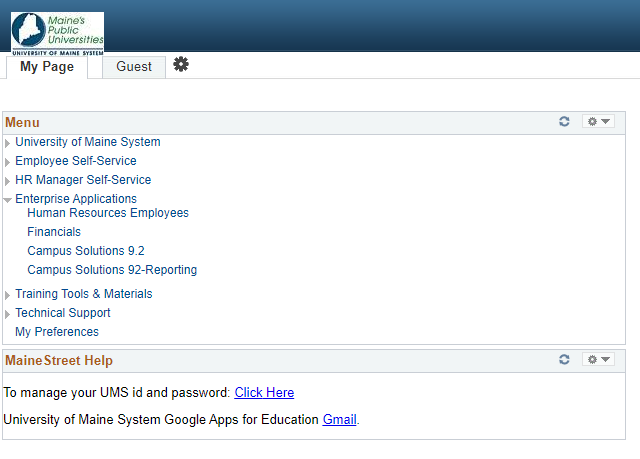
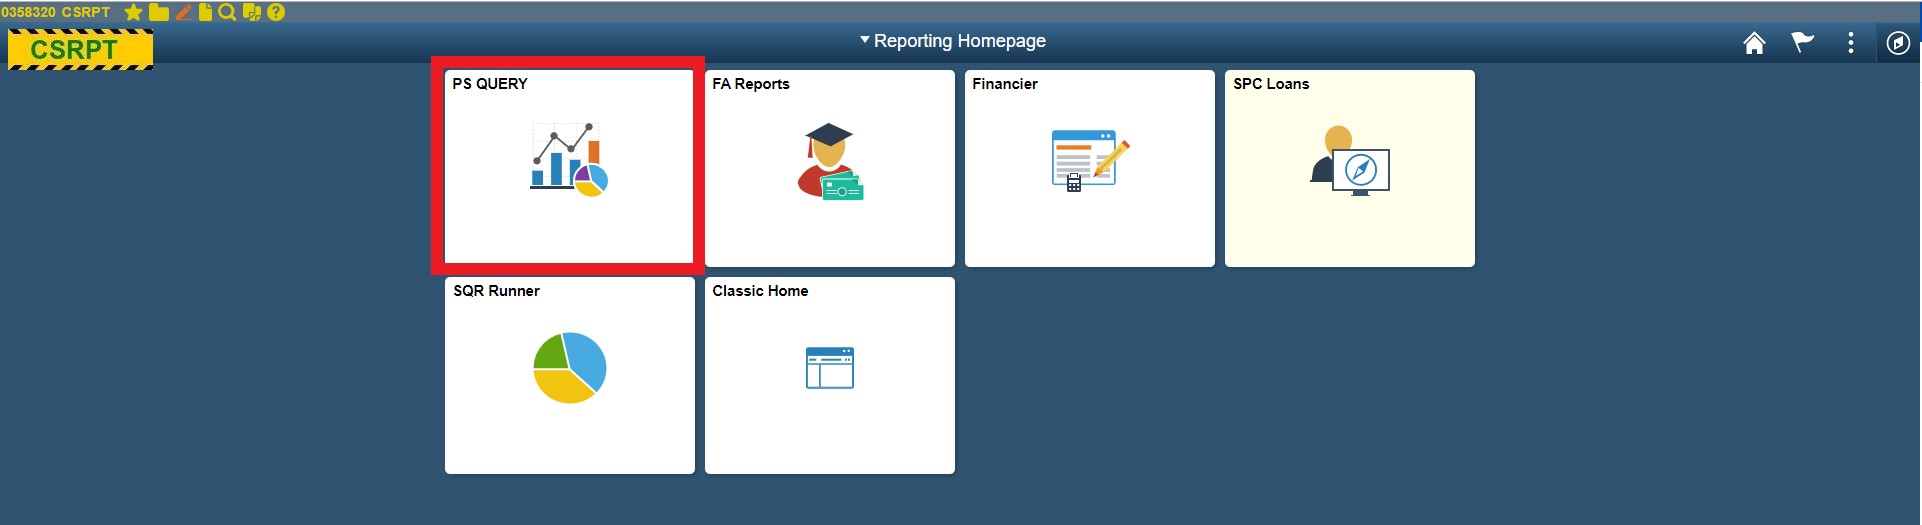
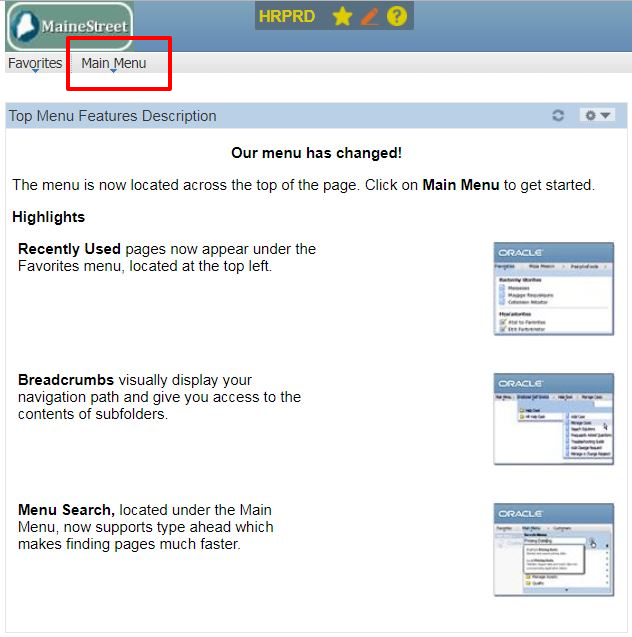
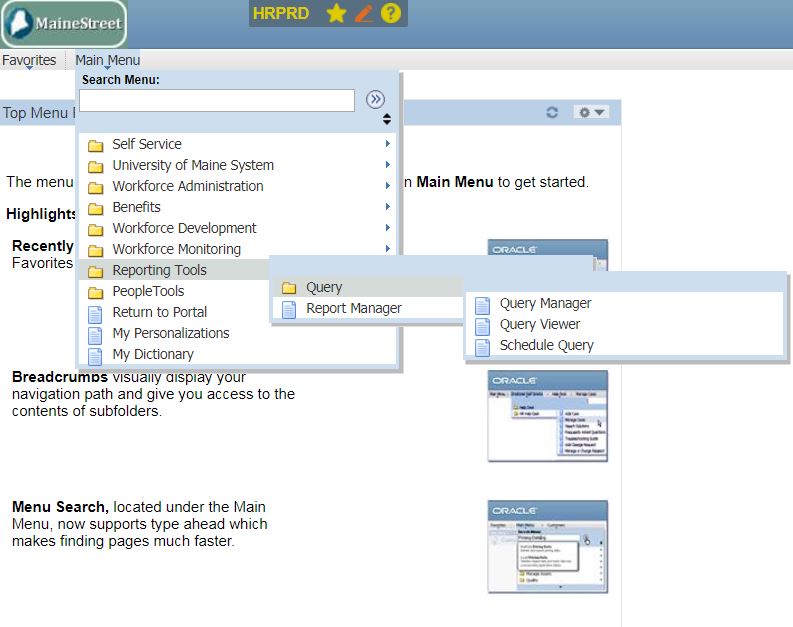
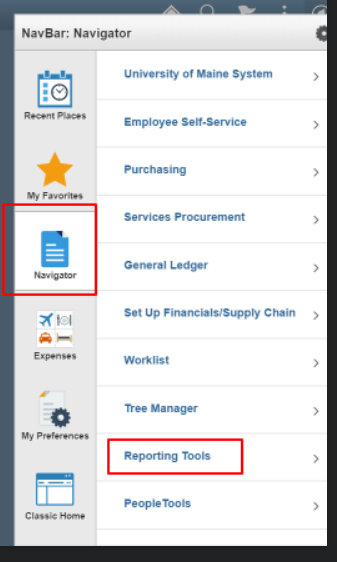
1 | Go to Query Manager in CSPRD or CSRPT (Read Running Reports with Query Viewer & Query Manager page for more information if needed) |
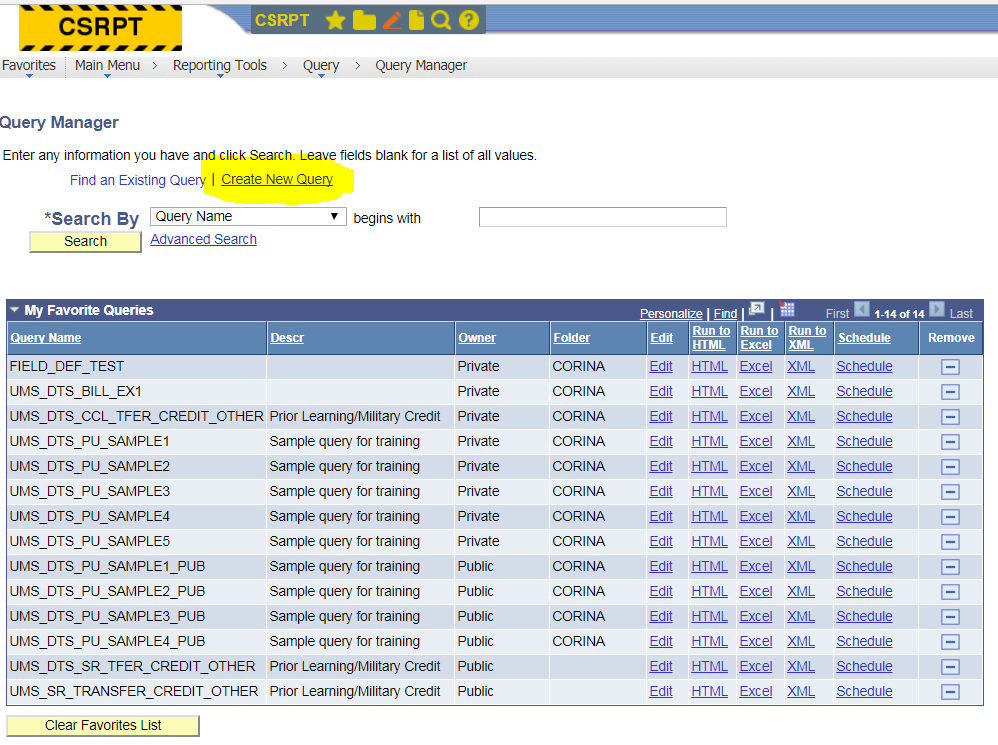
2 | Click the Create New Query link.  |
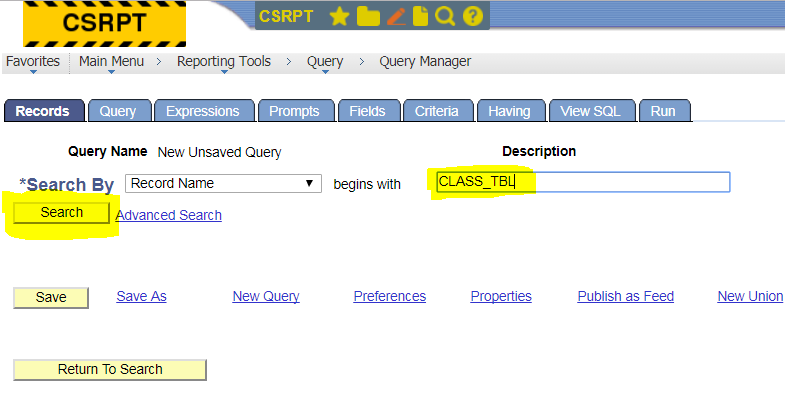
| 3 | The first step in creating a query is to find an existing record for the query. In this example, you will locate and use the Class Table record. Enter the desired information into the Description field. Enter "CLASS_TBL".  |
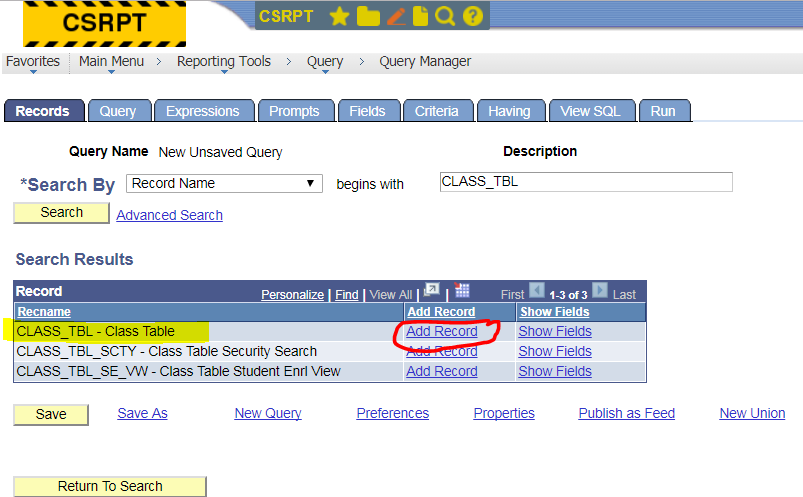
| 4 | Click the Add Record link for CLASS_TBL. |
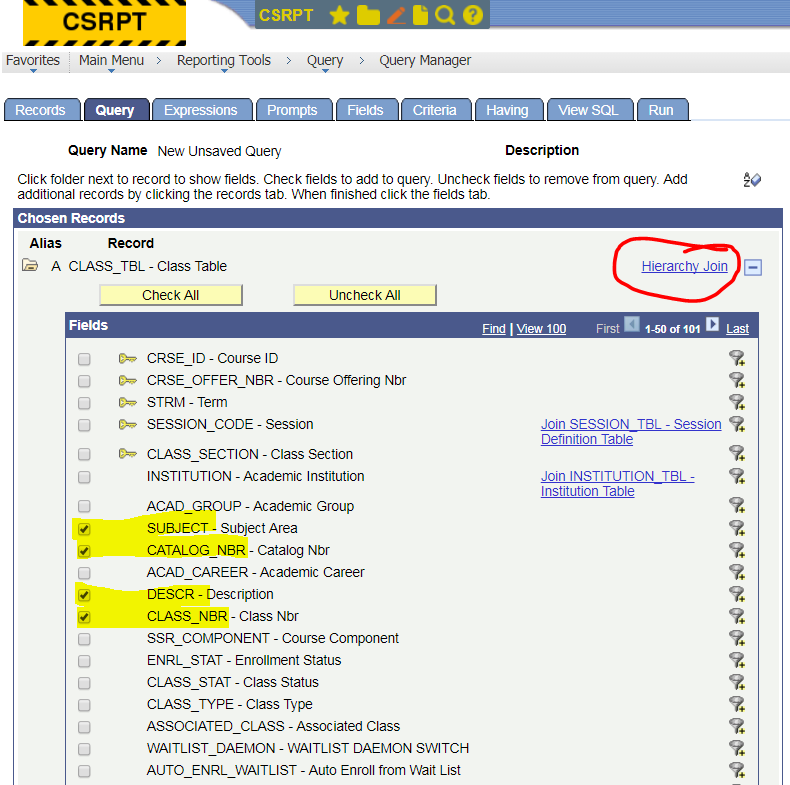
| 5 | Next, select the fields from the table Check the box for SUBJECT, CATALOG_NBR, DESCR, and CLASS_NBR fields. |
| 6 | Save the query before going to more steps. |


Back to Top
Add table using Hierarchy Join
If the hierarchy join is not available, or you prefer to join a table manually, skip to "Add table using Any Record Join" section (step #10)
Step | Action |
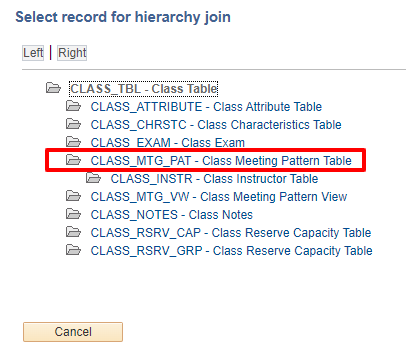
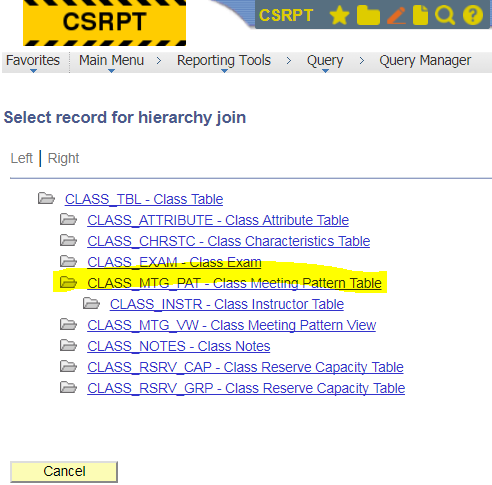
| 7 | In this example, you next need to select fields related to meeting information from the Class Meeting Pattern Table record. To join records that share a common high-level key, simply select the Hierarchy Join link. Click the Hierarchy Join link. |
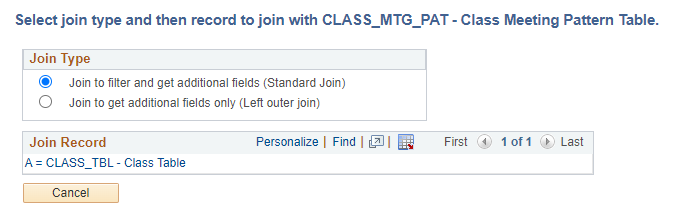
| 8 | A new page appears that allows you to select the record to be joined to your existing query. Note that the hierarchy on this page is not related to the hierarchy of the Dictionary Tree. Rather, the hierarchy shown is defined in the PeopleSoft Application Designer with the Parent Record Name feature. Click the CLASS_MTG_PAT - Class Meeting Pattern Table link. |
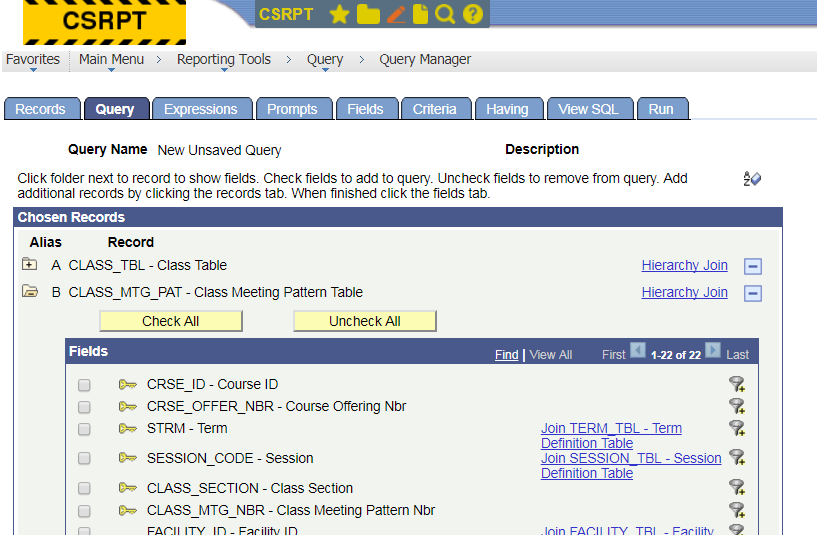
| 9 | Now you see two tables on the query. |

Back to Top
Add table using Any Record Join
Records beginning with UMS will typically not have children or parent tables identified as in above image and must be joined manually. See steps #10 - #12 to manually join a table.
Step | Action |
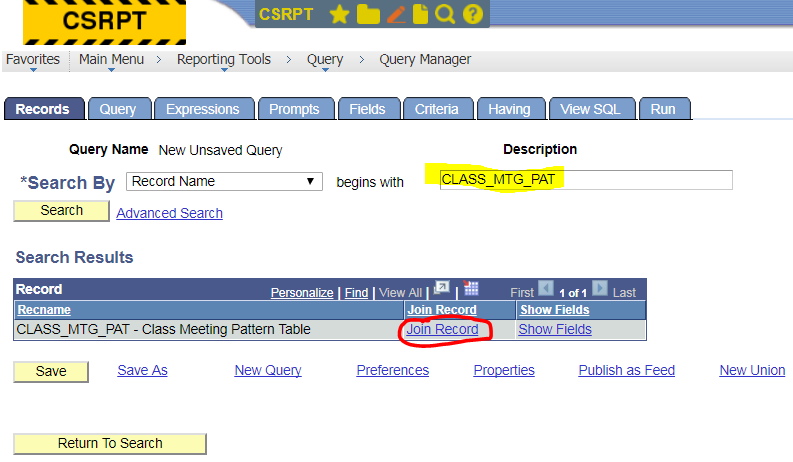
10 | Click on the Records tab and search for the CLASS_MTG_PAT table. |
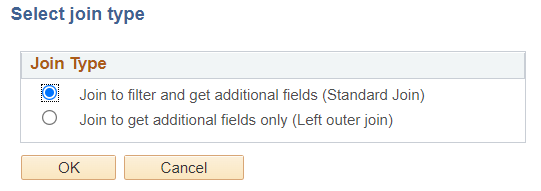
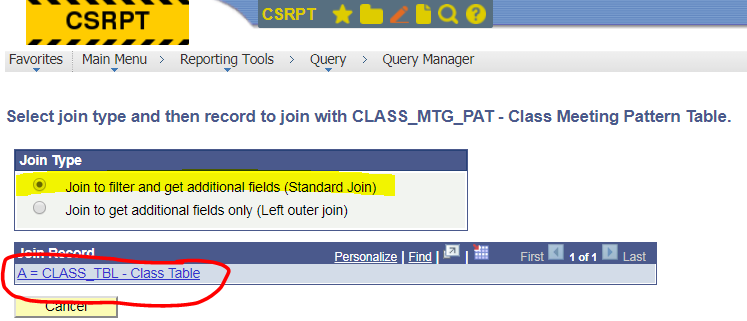
| 11 | Choose appropriate join: Standard Join or Left Outer Join (Read Join Types page for more information). In this example, Standard Join was selected. Click on the record name under "Join Record" box. |
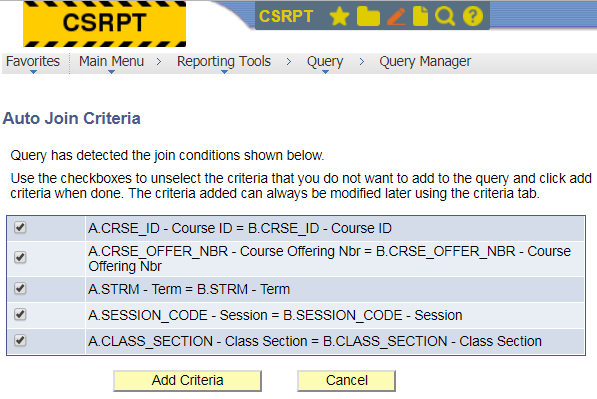
| 12 | Query Manager will detect and add the join criteria automatically. Click Add Criteria. |


Back to Top
First join is completed
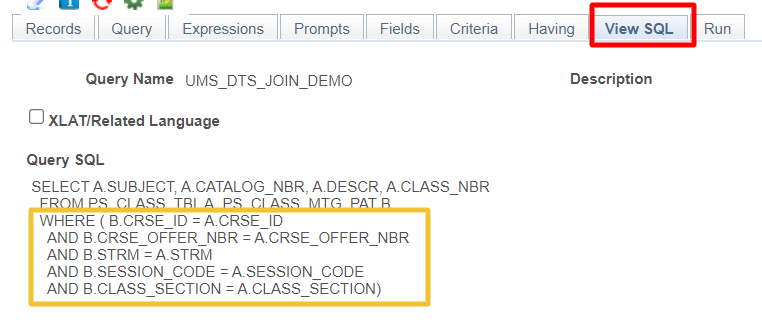
Regardless of which method you use to create your join, your newly joined record and its fields are displayed below the first record. Notice that each record added to your query is assigned an incremental letter that represents a correlation, or alias, of the record. The second record denotes that it was joined with the first record. In this example, CLASS_MTG_PAT (B) was joined with CLASS_TBL (A).

When you used the hierarchy join, the join criteria will not show on the Criteria page.

However, if you View SQL, the join criteria is showing the page:
When you used Any Record Join, the join criteria will show on the Criteria page.

Back to Top
Add fields from the joined table
Now you can select the fields from the joined record.
Step | Action |
13 | Go to Query tab and make sure the table B is expanded. |
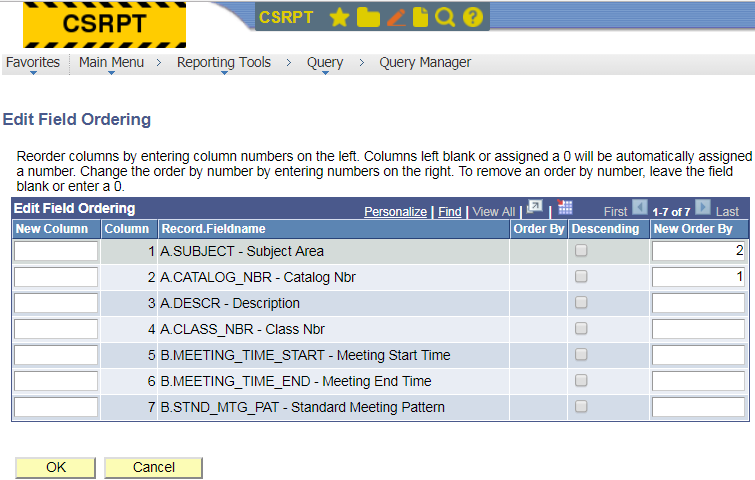
14 | Check the box for MEETING_TIME_START, MEETING_TIME_END, and STND_MTG_PAT fields. You can also click A-Z icon to sort the field name. |


Back to Top
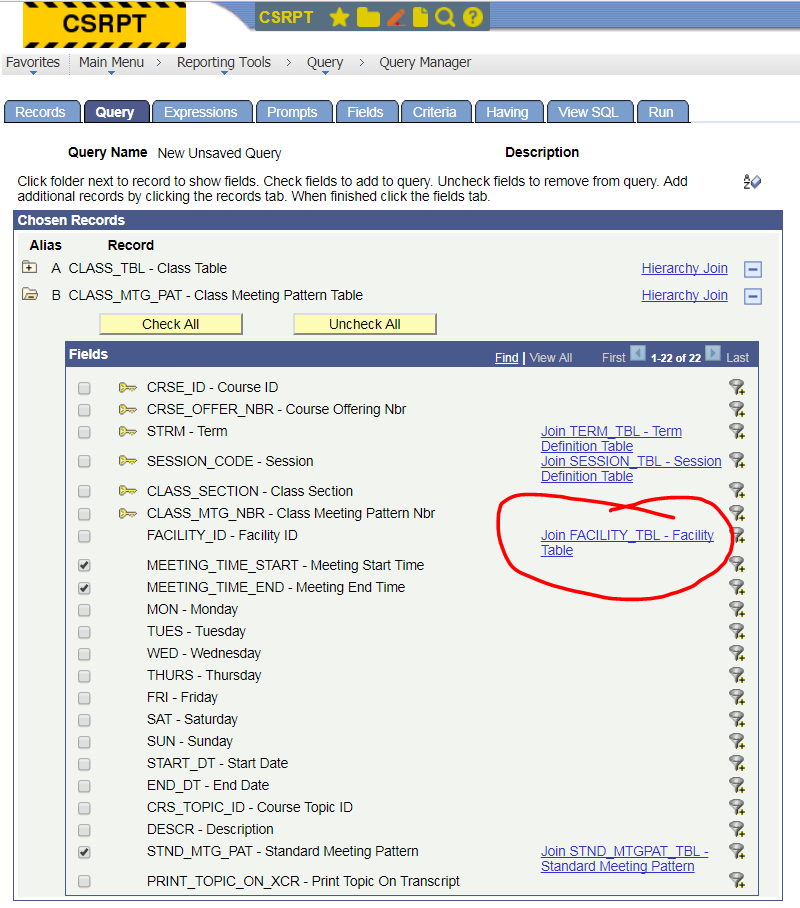
Related Record Join
Related records are specific to a field in the current record. If a field has a related record, you will see the record displayed as a hyperlink next to the field.
Step | Action |
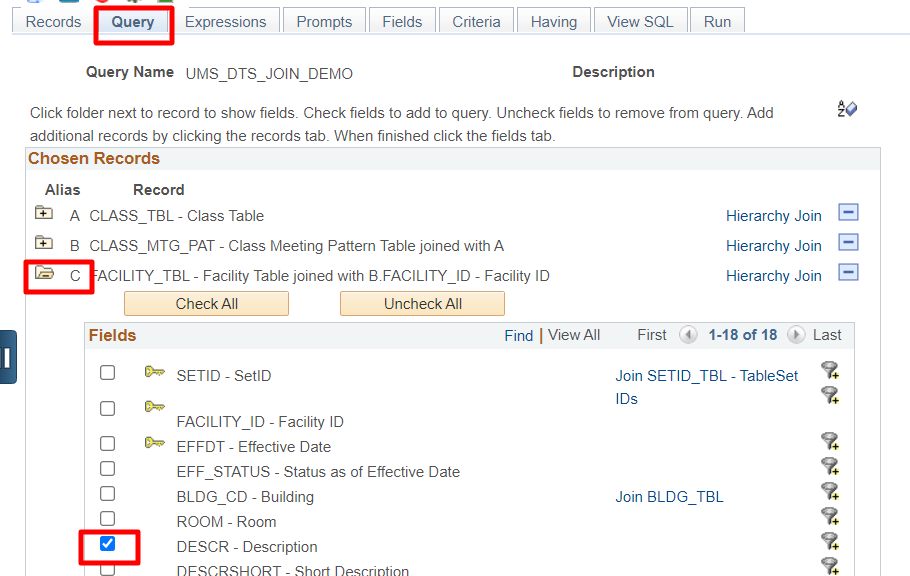
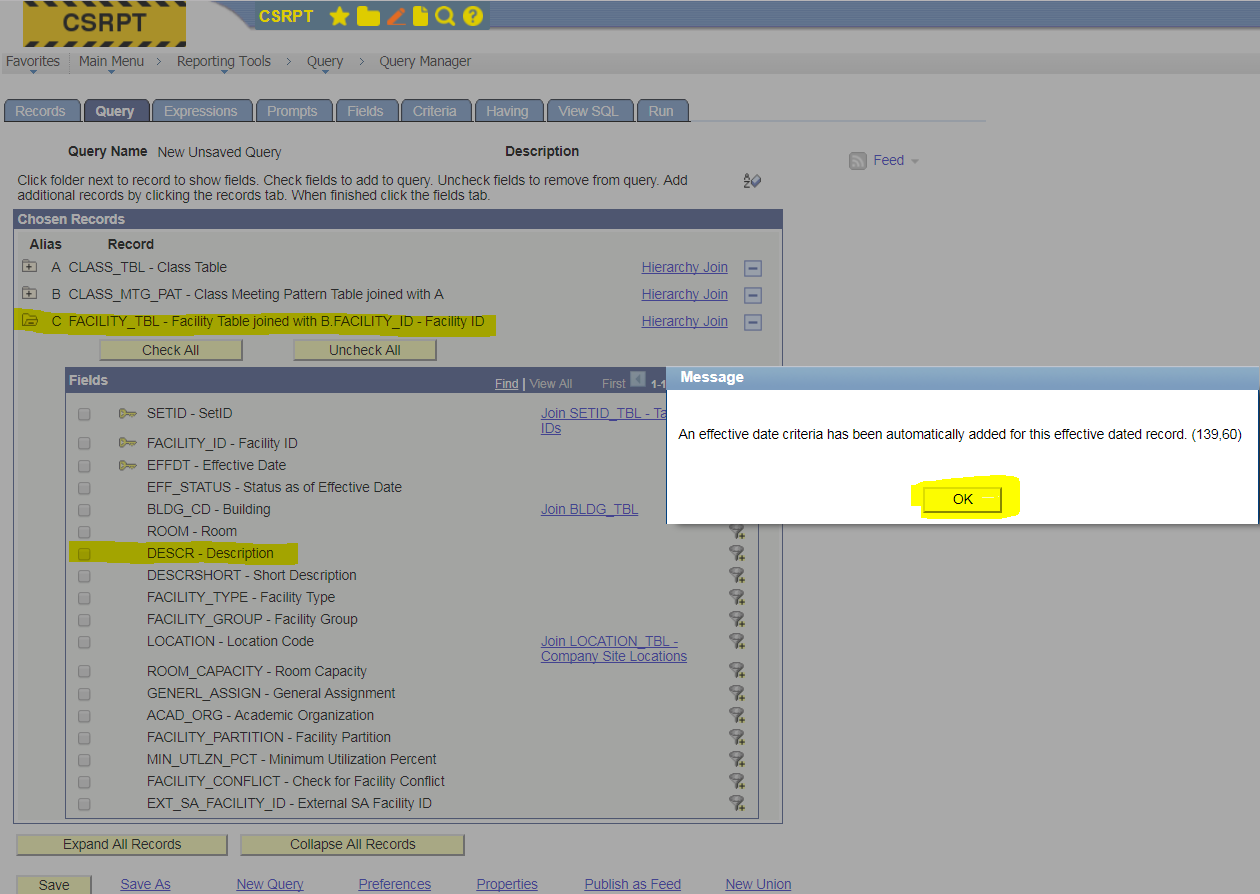
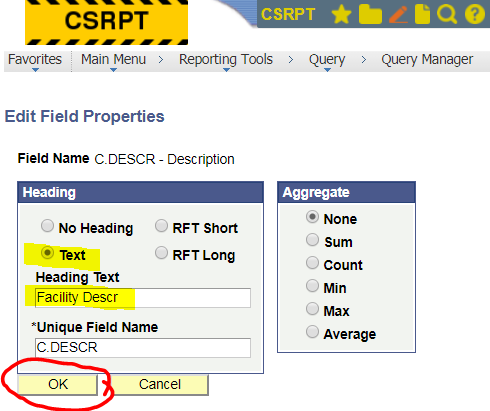
15 | Next for this example, you will select the Facility Description field from the Facility Table record. Click the Join FACILITY_TBL link. |
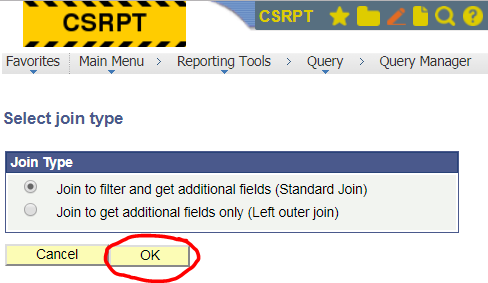
| 16 | Choose appropriate join: Standard Join or Left Outer Join (Read Join Types page for more information). In this example, Standard Join was selected. |
| 17 | Pop-up window regarding Effective date will show up and click OK
If you go to the Criteria tab, you can see the effective date criteria. To learn more about Effective date, please go to Effective Date page. |
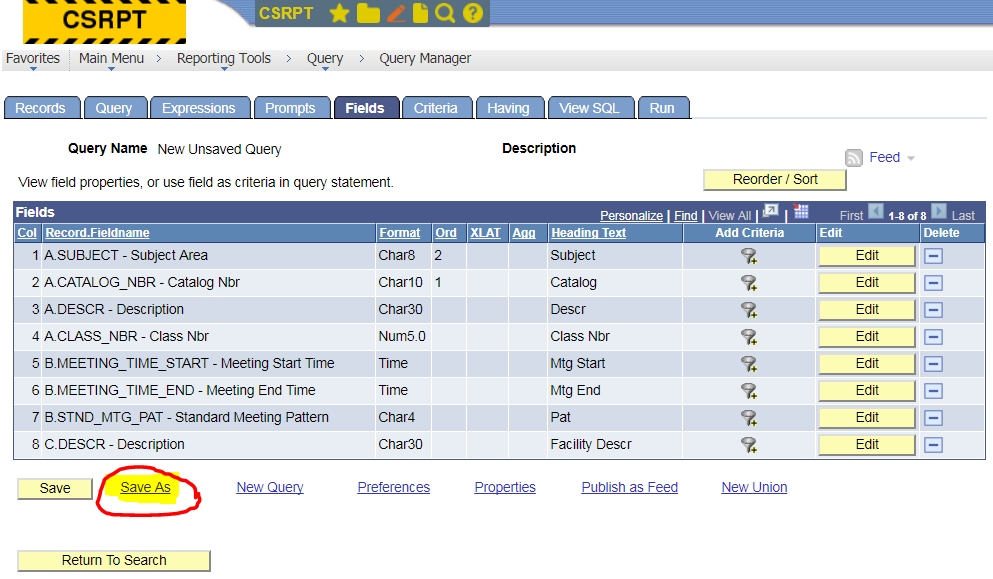
| 18 | On Query tab, you now see three tables. |


Back to Top
Check the Query
Step | Action |
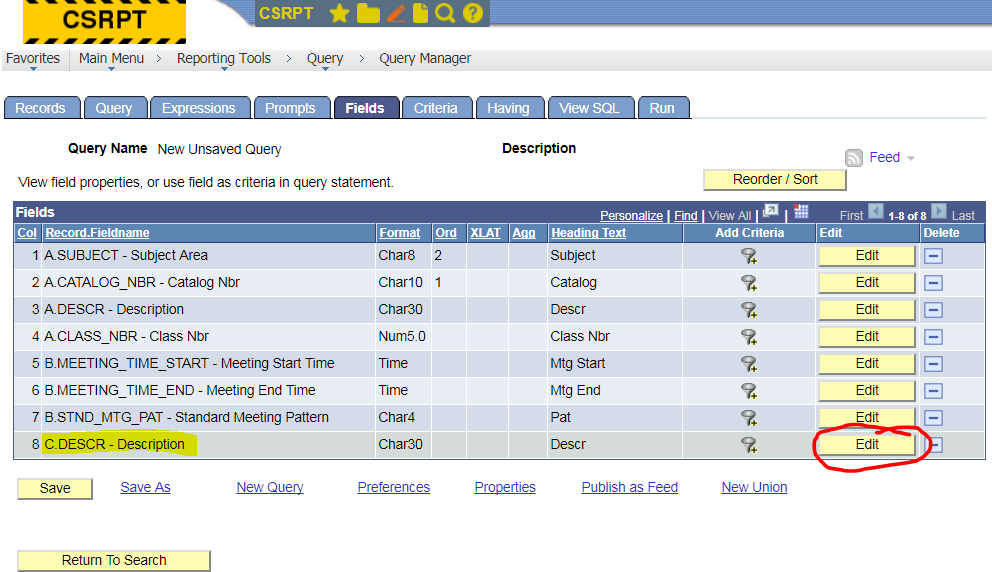
19 | Go to Fields page and make sure all fields you wanted is listed. |
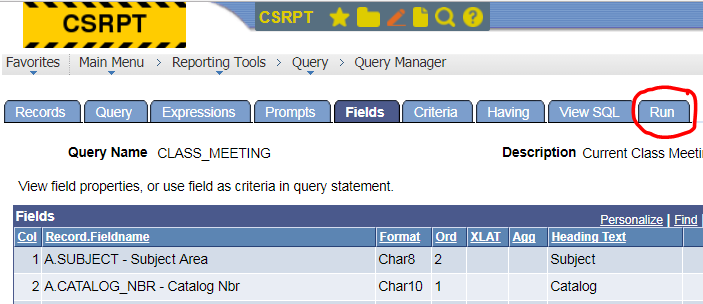
| 20 | Run the query to view the results of the query. If you don't satisfy with the results, check criteria or other pages. You can also change join type or join procedures to test the query. |
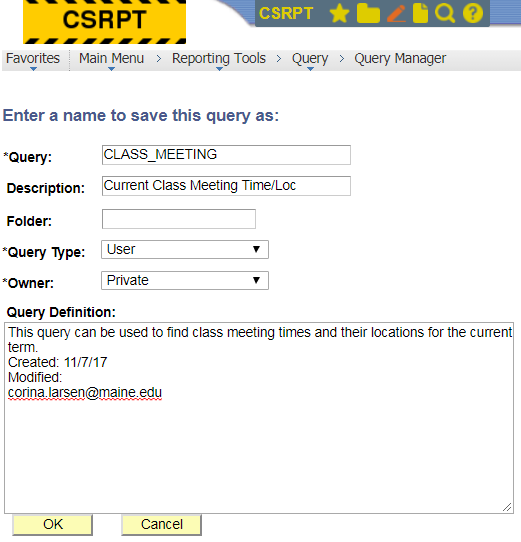
| 21 | Don't forget to save the query. Read Sign/Comment section on Edit Queries page for more information. |

You have successfully joined 2 additional tables.
Back to Top
HELP IS AT HAND!
 Question, comment, critique? We are here to help and we strive to make our site a comprehensive, user friendly experience. Contact us at DARTS@maine.edu.
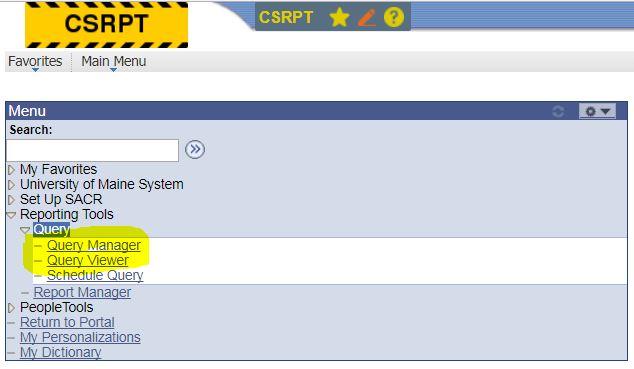