This section assumes you are familiar with the steps in Running Reports with Query Viewer & Query Manager.
Steps in Creating a New Query with Query Manager
Design the report layout on paper or in your mind (optional)
Select the Records to be used
Select the Fields to be displayed on the report
Create Criteria (see Changing a Selection for Variables in a Criteria)
Create Prompts if desired (see Adding a New Prompt)
Create Expressions (see Creating Expressions)
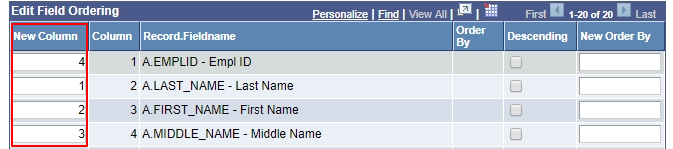
Arrange Fields in the correct order (Column Order) (see Editing Queries#columnorderColumnOrder)
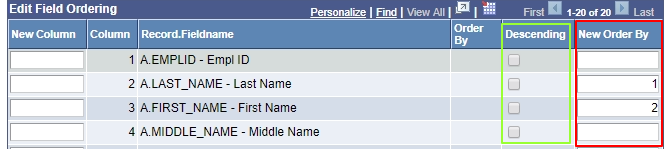
Select Sort Order if desired (see Editing Queries#SortingOrder)
Save Query (see Editing Queries#Sign/Comment)
Run report
Important Terms and Symbols
Regardless of which database you are working with, there are some basic functions that apply to creating any new query.
Add Record | Click this link to access the Query page, where you can add fields to the query content or add additional records. |
Show Fields | Click this link to display the fields included in the record. |
Col (column) | Displays the current column number for each field listed. |
Query Name | New Unsaved Query appears in this read-only field until you change it on the Properties page. This field appears on all of the Create New Query pages. |
Record.Fieldname | Displays the record alias and name for each field listed. |
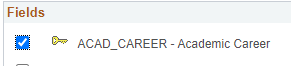
 | Indicates key fields. Show on the left of key fields |
 | Click the Delete button to delete the row. A confirmation message appears. Click the Yes button to proceed with the deletion. Click the No button to cancel the deletion. |
 | Click the icon to open the Edit Criteria Properties page, where you can determine how this field will be used as a criterion for the current query. |
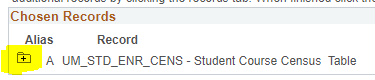
 | From the Query tab, click the Folder button to view the fields for the chosen record, if they are not already displayed. Query Manager expands the record so that you can see the fields and make sure that this record has the content that you want. Click the Folder button again to hide the fields for a record. |
Creating a New Query
After navigating to Query Manager (you cannot edit or create queries with Query Viewer), select the Create New Query option.

In the Description box of the Search By bar, begin typing the name of the table (record) you want to use in your query. If you don't know the table name, see Finding Your Data page for finding table. You can also see UMS Index of Reporting Tables page.

If you want to view a record's fields, click Show Fields next to the record. A page displays the record's fields. You can use this information to verify whether you want to base the query upon this record. Some tables are documented on UMS Index of Reporting Tables page.

Click Return when you have finished looking at the fields.
Select a table (record) for your query using the Add Record link. This takes you to the Query tab from which you can select which fields from the selected record to add to the query.
Records (Tables)
NOTE
In your PeopleSoft database, tables are represented as record definitions. In PeopleSoft Query, we refer to the record definitions as records.
To select a record:
Find the record upon which to base the query.
If you know the entire record name, description, access group name, or field name included in the record, select the appropriate item in the Search By drop-down list box. Enter the name in the field (or click the Look Up button if searching by access group name). Then click the Search button to display a list of records that match your search criteria.
You can perform a partial search by entering part of the name in the Search By field.
NOTE
Note: Enter as much of the name as possible to find the correct record.
You can perform an advanced search by clicking the Advanced Search link. You can perform a progressively narrower search by selecting conditions for the record name, record description, or field name contained in the record, and then entering an appropriate search string in the fields that correspond to your selections. For access group name, select a condition, click the Lookup Name button, and then select the access group name from the list of access group trees that appears.
If you want to view a list of available records, leave the field blank and click the Search button to display a list of up to 300 records.
By default, only the first 20 records appear on the page. To see more of the list, use the navigation buttons and links located on the header bar. To display 100 of the records, select the View 100 link, and use the scrollbar to go through the rest of the list.
You can only add those tables to which your operator class has access. Others will not appear in the table list.
Record Joins
If information is not on the table you added first, you can add more tables to the same query. Please see Creating Record (Table) Joins for detailed instructions for joining tables.
Query Fields
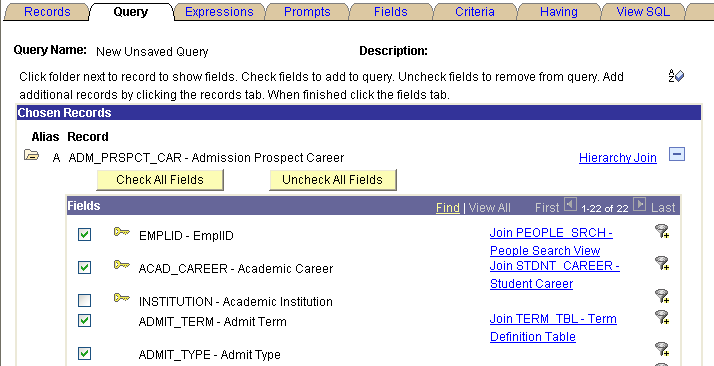
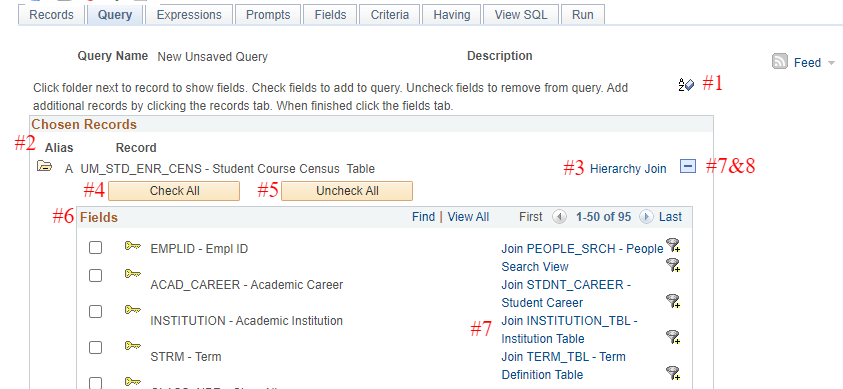
After adding a record, you are presented with the Query page. It will show all of the fields in the selected record (table).
On this page, you can choose the fields or adding criteria for the query.
The screenshot and table below describes each function on this Query page.

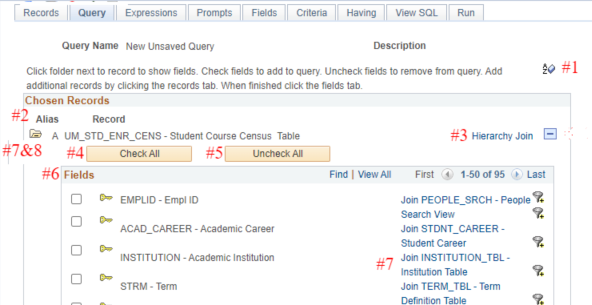
| Number in the screenshot | Function | Description |
|---|---|---|
1 | Sort | Sort list fields in alphabetical order. Click the button again to return to the original sort order. For tables with a large number of fields, you may want to sort them to make field selection easier. |
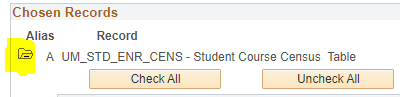
| 2 | Alias | The alias name that the system automatically assigns to the chosen records. |
| 3 | Hierarchy Join | Click this link to join a child table to its parent table. See Creating Record (Table) Joins for detailed instructions |
| 4 | Check All | Click this button to choose all fields in the record. Once you select a field, the system automatically adds it to the query and you can view it on the Fields page. This button does not appear when the field names are hidden. |
| 5 | Uncheck All | Click this button to clear all fields in the record. |
| 6 | Fields | Select the check box to the left of each field that you want to add to your query content. |
| 7 | Related Record Join | Click such links to join two records that are based on a shared field. For example, in the above example, the UM_STD_ENR_CENS record is related to the INSTITUTION_TBL record by the INSTITUTION field. Please note that this suggestion is not always correct. See Creating Record (Table) Joins for detailed instructions |
| 8 | Expand All Records | Click this button to view all fields in the records. This button appears only when there is more than one record listed. |
| 9 | Collapse All Records | Click this button to hide all fields in the records. This button appears only when there is more than one record listed.
|


You can always go back and add more fields.
After you finish choosing the field, you can go to the Fields page to see the information about the fields to be used in the query.
Fields Page
This page show information about the fields to be used in the query.

| Function | Descriptions |
|---|---|
Col | The order in which the field will be displayed in the query results. |
Record/Fieldname | The alias and field name. |
Format | This is the format of the field as defined in the database. |
Ord | There will be a number here if the field was selected for sorting. |
XLAT | This indicates if the field is from the translate table. |
Agg | This indicates if an aggregate function has been assigned to the field |
Heading Text | The default heading text as defined in the data base. |
Add Criteria | Click to add a row of criteria to the query using this field. |
Edit | Select to edit the field’s properties |
Delete | Select to remove the field from the query |
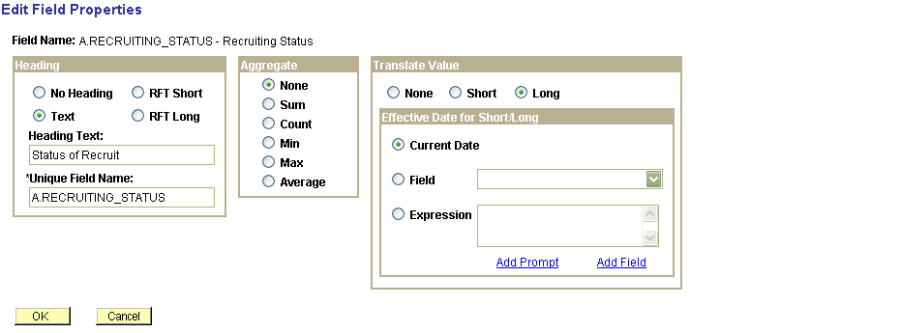
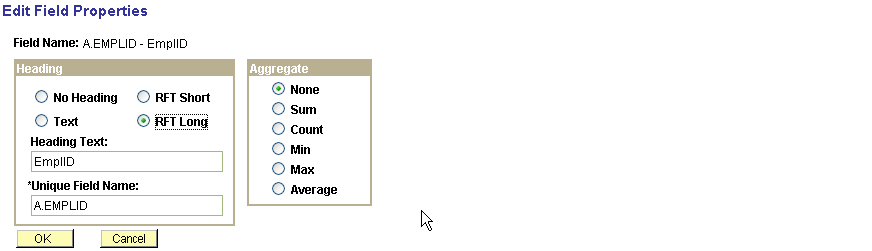
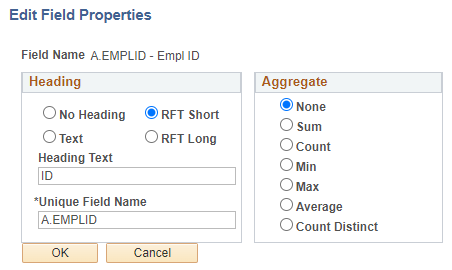
Field Properties
The query tool allows you to change certain field properties by clicking ![]() next to the field.
next to the field. 
No Heading | If selected, the data will have no heading |
RFT Short | The Record Field Text short description as defined in the database will be used for the heading. This is usually the default. |
RFT Long | The Record Field Text long description as defined in the database will be used for the heading. |
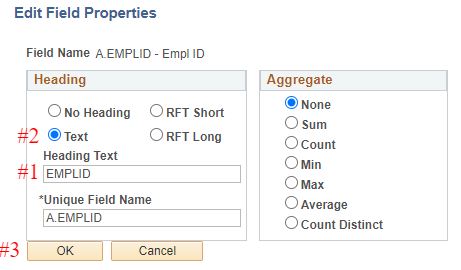
Text | Text typed into the Heading Text field will be used for the heading. |
Unique Field Name | Let the system figure this out! |
Aggregates | We'll discuss this later |
Translate Values | Only appears for fields defined as having translate table values in the database. Select None (the code will display), Short or Long. Translate table values are effective dated. Selecting Current data works best for most cases. |
Fields that don't have translate values associated with them will not show that section when they are edited.
Example for changing the heading text is on this page.
Additional Features
There are a lot more you can do in a query. Click the following links listed with each feature.
- Create Criteria (see Changing a Selection for Variables in a Criteria)
- Create Prompts (see Adding a New Prompt)
- Create Expressions (see Creating Expressions)
- Arrange Fields in the correct order (Column Order) (see Editing Queries#columnorderColumnOrder)
- Select Sort Order (see Editing Queries#SortingOrder)
- Save Query (see Editing Queries#Sign/Comment)
HELP IS AT HAND!
 Question, comment, critique? We are here to help and we strive to make our site a comprehensive, user-friendly experience. Contact us at DARTS@maine.edu.